Blogging without a PC seems to be intimidating. But the fact is wherever you go, you will find mobile users. Whether you travel in a bus, train or a flight, people use their phones. So why not blogging with an iPhone?
A smartphone or an iPhone is handy to perform smaller tasks. With Google docs and other iPhone apps, it’s easy to complete tasks on the go.
The idea seems to be tough to implement, but as you get started you will find it extraordinary.
I have been blogging with my iPhone without a PC for many times. At first, the idea of blogging with an iPhone seemed to be not so cool. But as I started proofreading and editing articles, I was confident.
It’s a pain to type a lot, but with voice recognition, it got a lot easier. A smart phone is smaller in size, but can do big wonders.
So here’s my practical trick and guide to start blogging with an iPhone/iPad without a PC.
Buying a Domain with an iPhone
In this section of blogging without a PC, I will show you how you can register a domain name. You can also check out the screenshots below.
A domain name is what you need as your online identity. Consider it as your online name by which people would search you and your work.
The first step to blogging without a PC requires domain registration. You can do it easily with an iPhone on SeekaHost.app
SeekaHost.app is my favorite platform to buy a domain name and hosting.
Steps To buy A Domain Name
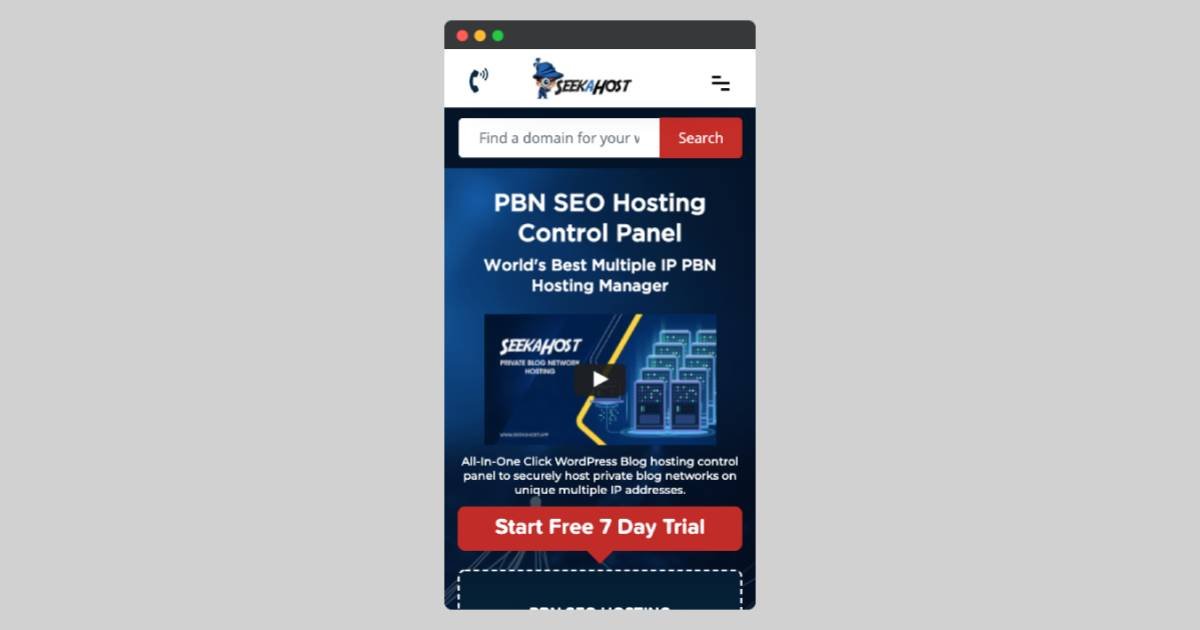
Firstly, visit the official SeekaHost.app website.
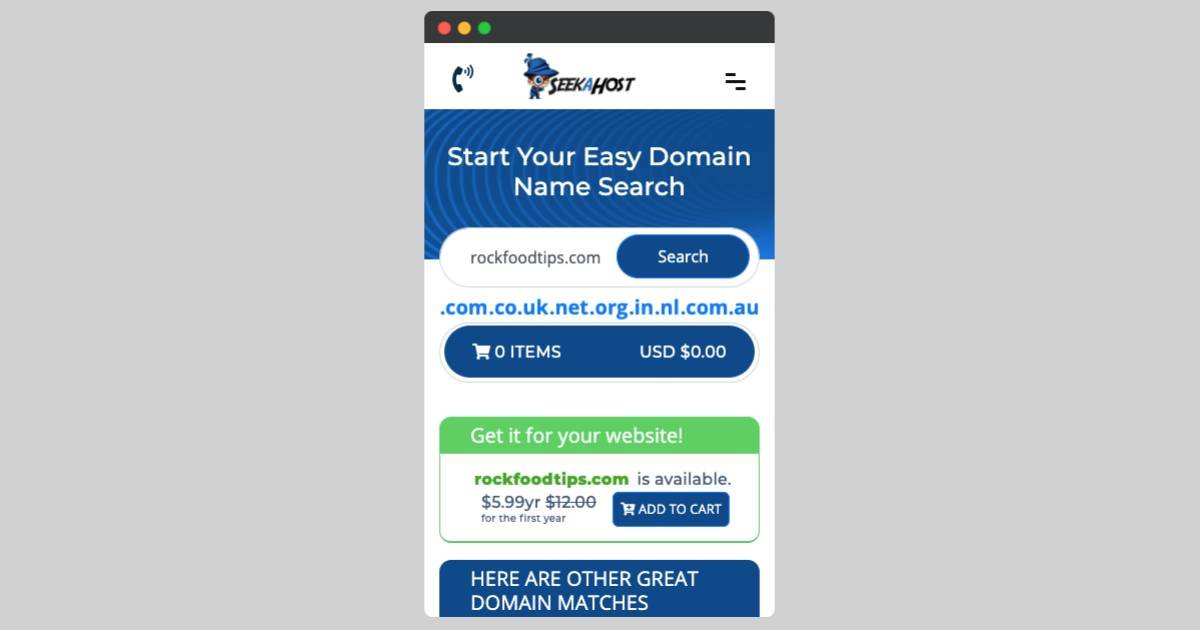
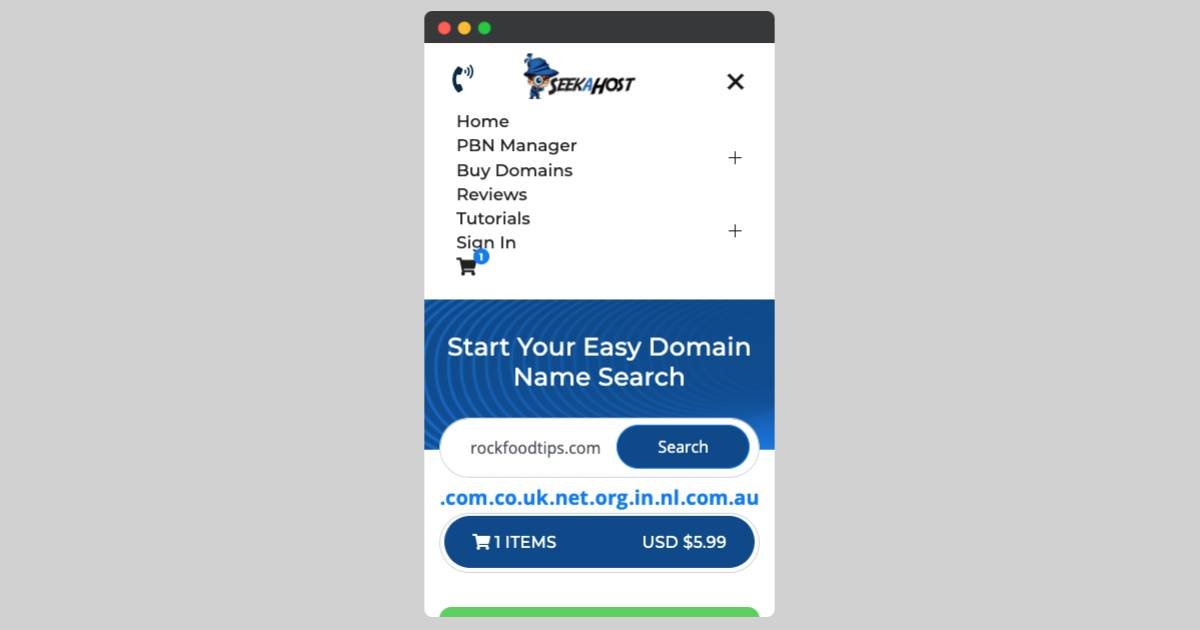
In the search box, enter your preferred domain name. Their system will automatically show you related domain names. It will also show you whether the domain name you entered is available or not.
If the domain is available, you can proceed with the checkout.
Since you are registering a domain name for the first time at SeekaHost.app, you need to create your account.
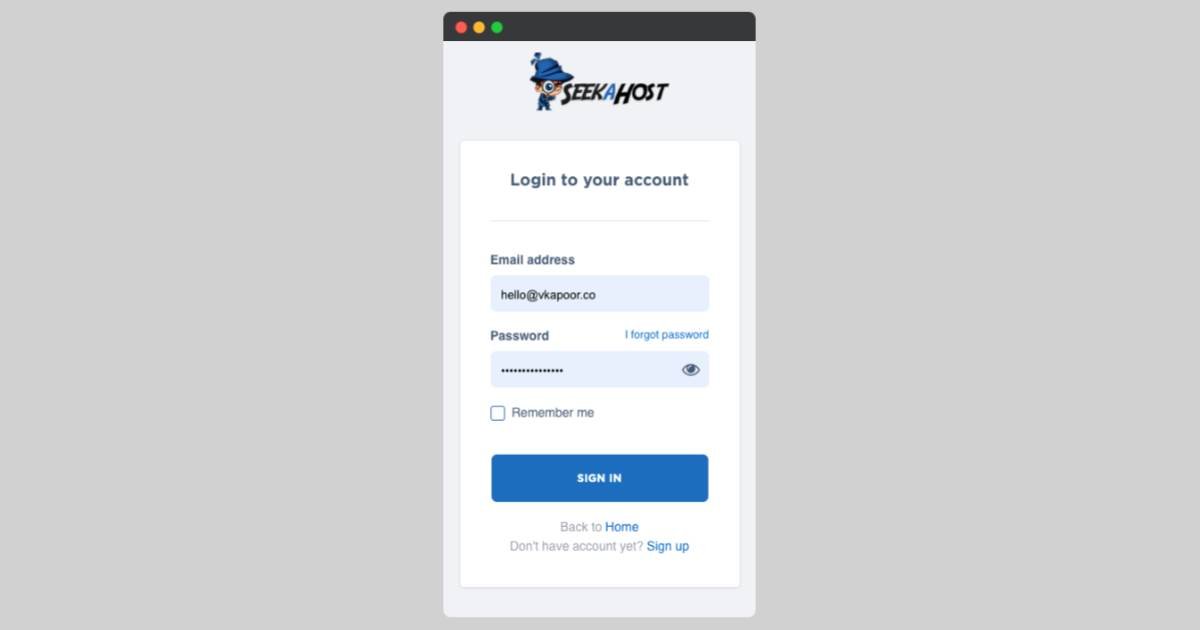
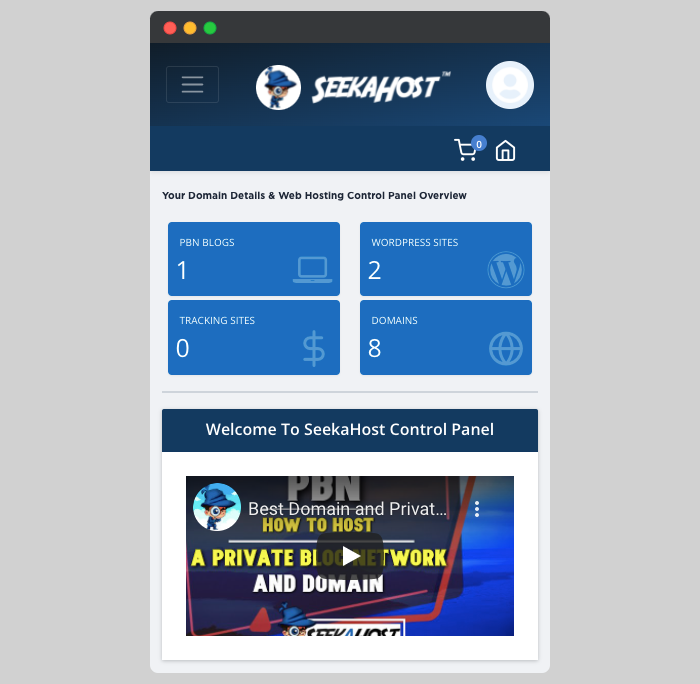
Once you have created your free account, you can login to the SeekaHost.app domain manager and will land on the order process.
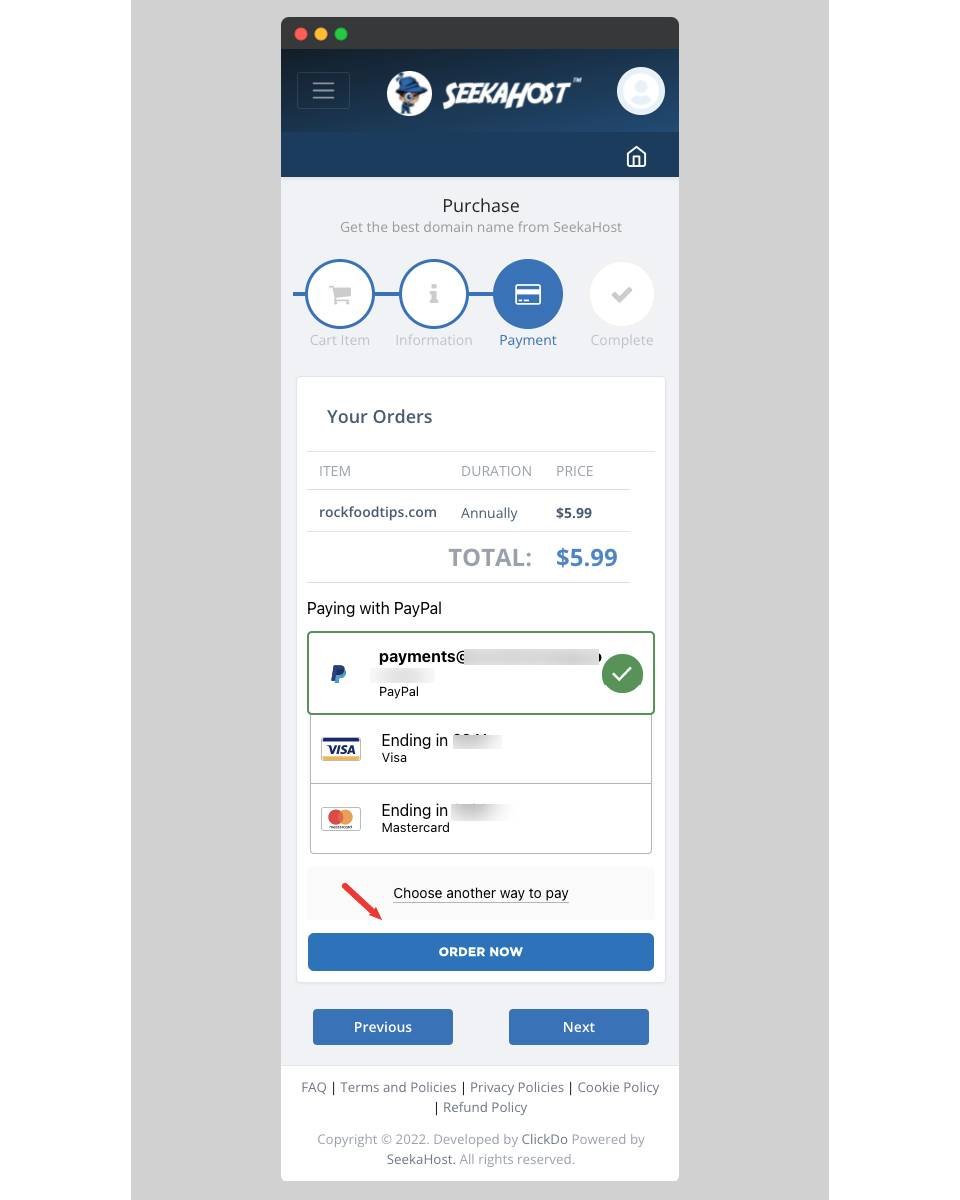
After logging in to the dashboard, you can find the domain name listed with its price. Get your personal details filled in quickly to proceed with the payment process.
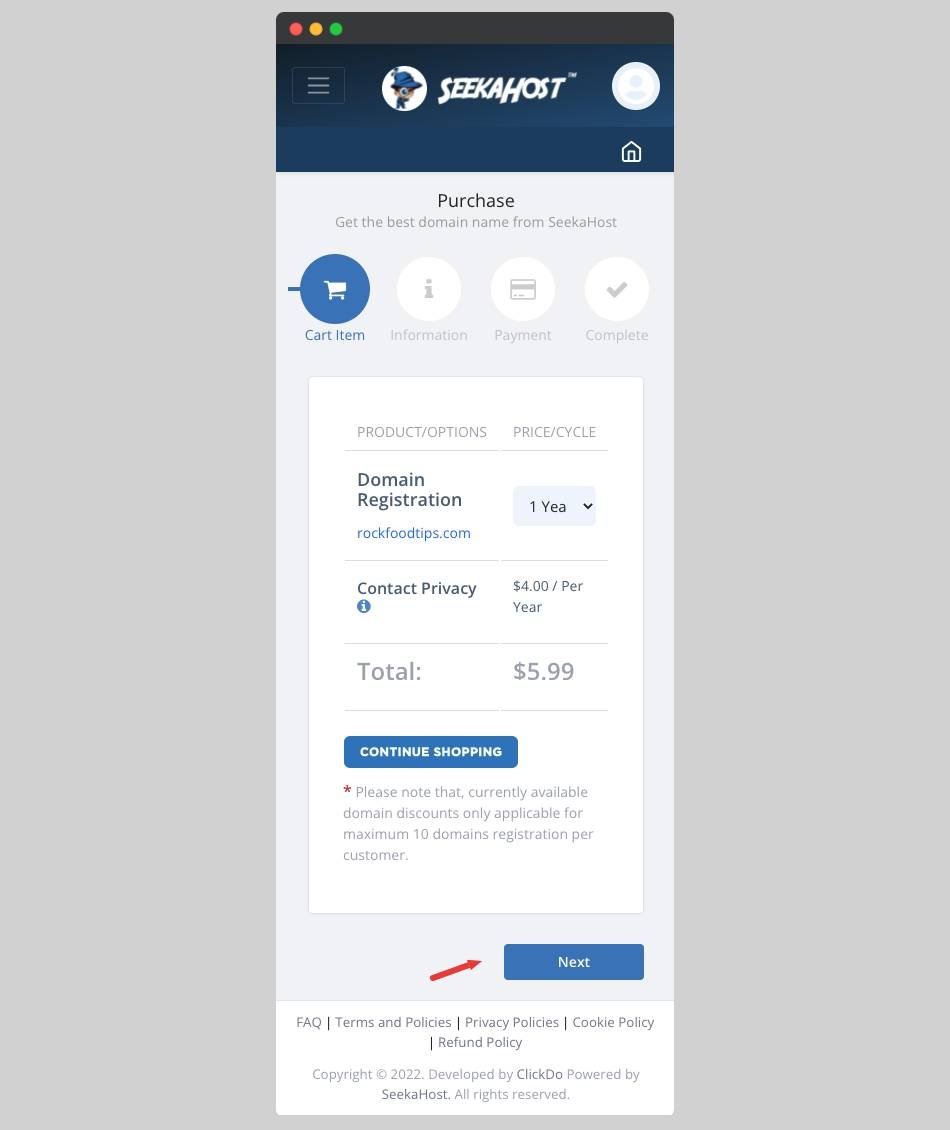
You can pay with Debit/Credit card. Once the payment is successful, you get the domain name register. Check your email for the invoice.
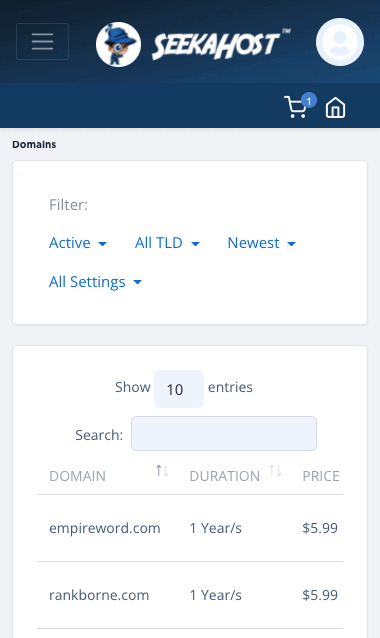
The domain cost is $5.99 per year which is the cheapest.
This hardly takes less than a minute even when registering with a phone.
The reason I prefer SeekaHost.app is because of its cheap price and flexibility. At SeekaHost.app, you can manage domain & hosting from the same dashboard.
So, you have the domain name registered. The next thing you need to start blogging with an iPhone is web hosting.
How To buy a Hosting with iPhone on SeekaHost.app?
Domain and hosting both work in synchronization to start blogging. Once the domain is registered, you should quickly buy a hosting and link the domain with it.
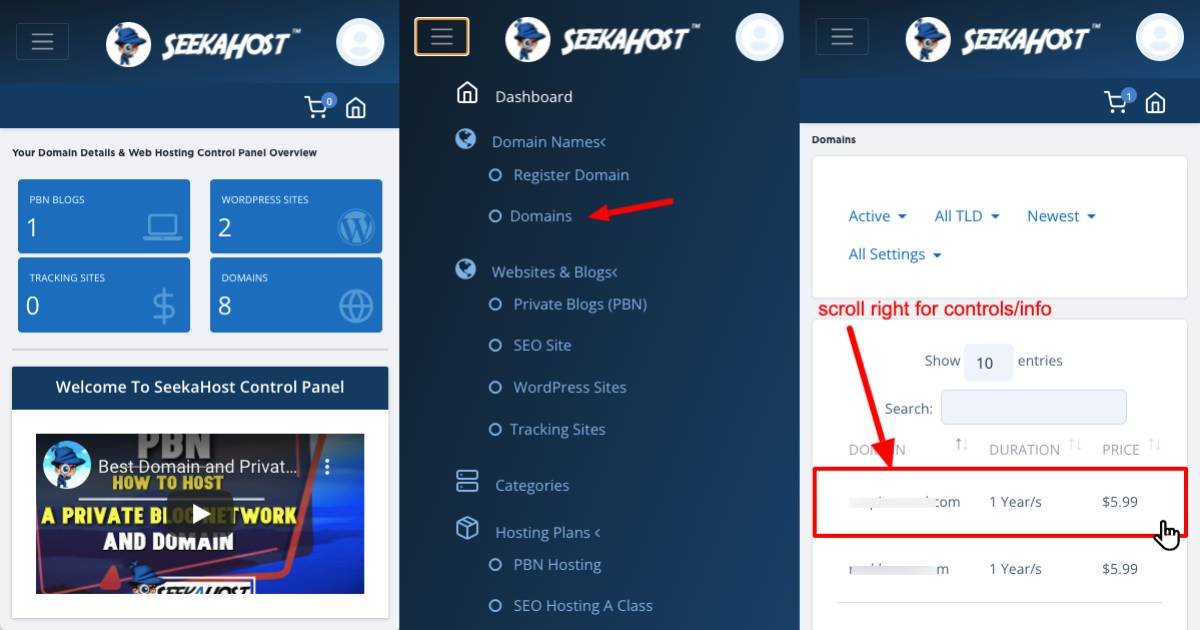
It’s difficult to operate multiple windows using a phone. But with SeekaHost.app, you need not login to another dashboard. With a single login & dashboard, you can buy a hosting plan.
Inside the Seekahost dashboard, you will find hosting plans on the left navigation panel. Choose WordPress hosting as it is the cheapest wordpress hosting plan and offers one-click WordPress installation.
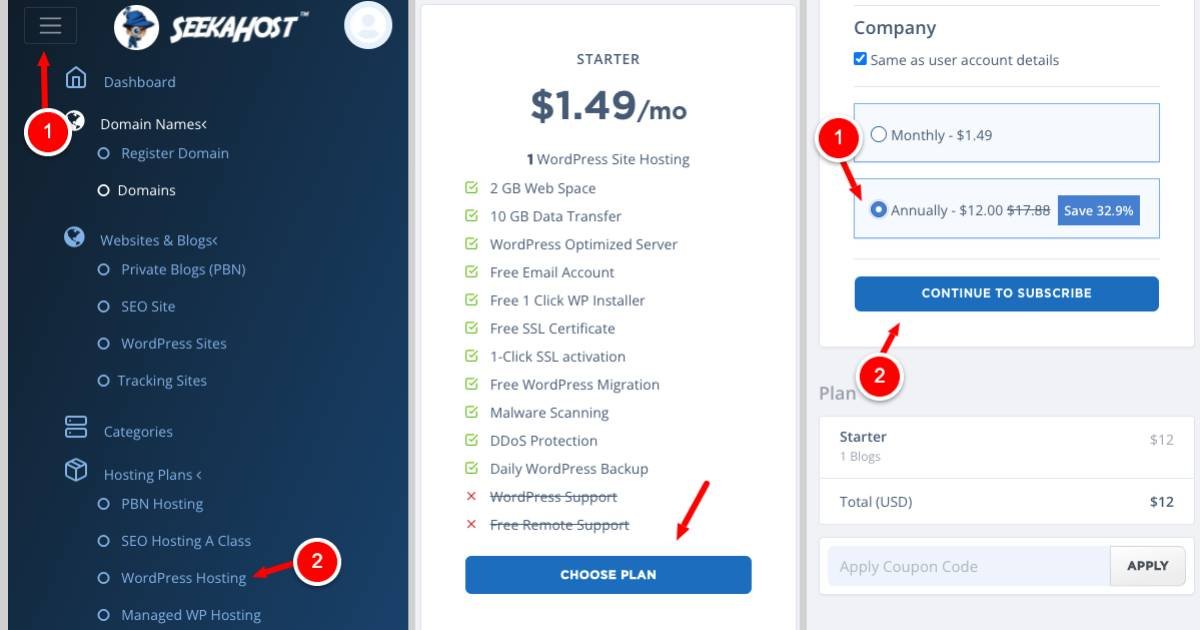
- Out of four WordPress hosting plans, you can choose the Standard plan at $5.5 per month. If you are low on budget, you can choose the Starter plan at $1.49 per month.
- Click on Choose plan and just as you bought the domain name, buy the hosting with the same payment procedure.
You now have both the domain name and the hosting.
So, buying the domain and hosting with a mobile phone was easy?
Trust me it’s quite easy. Now comes the tweeky part.
Don’t worry, I won’t ask you to log out.
Setting Up WordPress
As I mentioned earlier, choosing a WordPress hosting plan offers one-click WordPress installation.
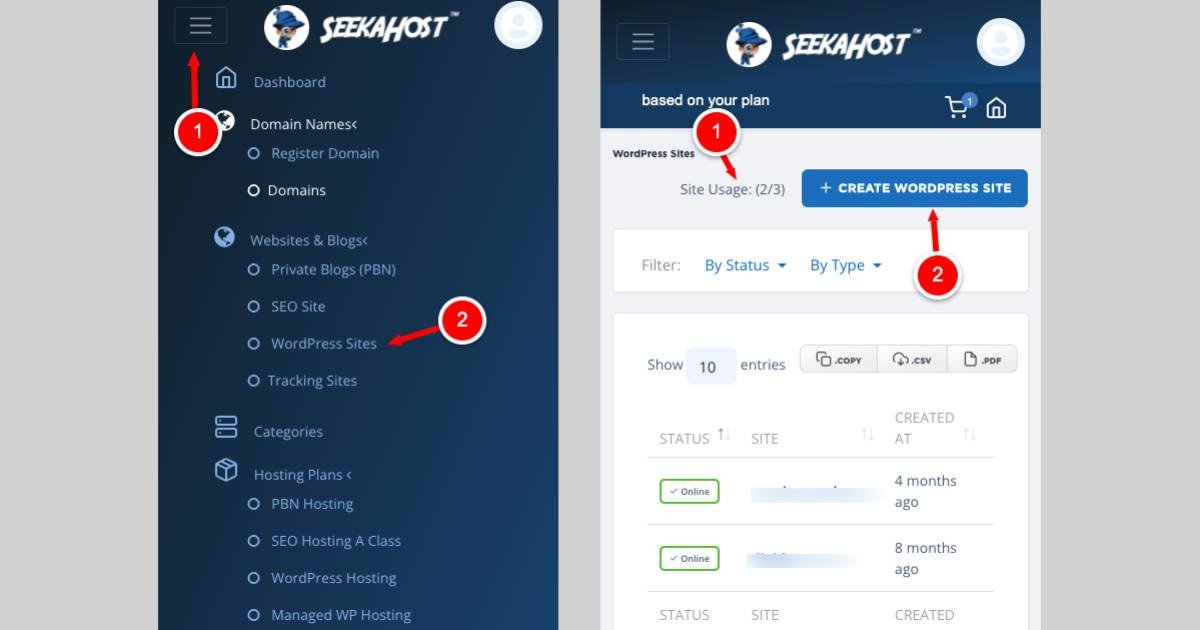
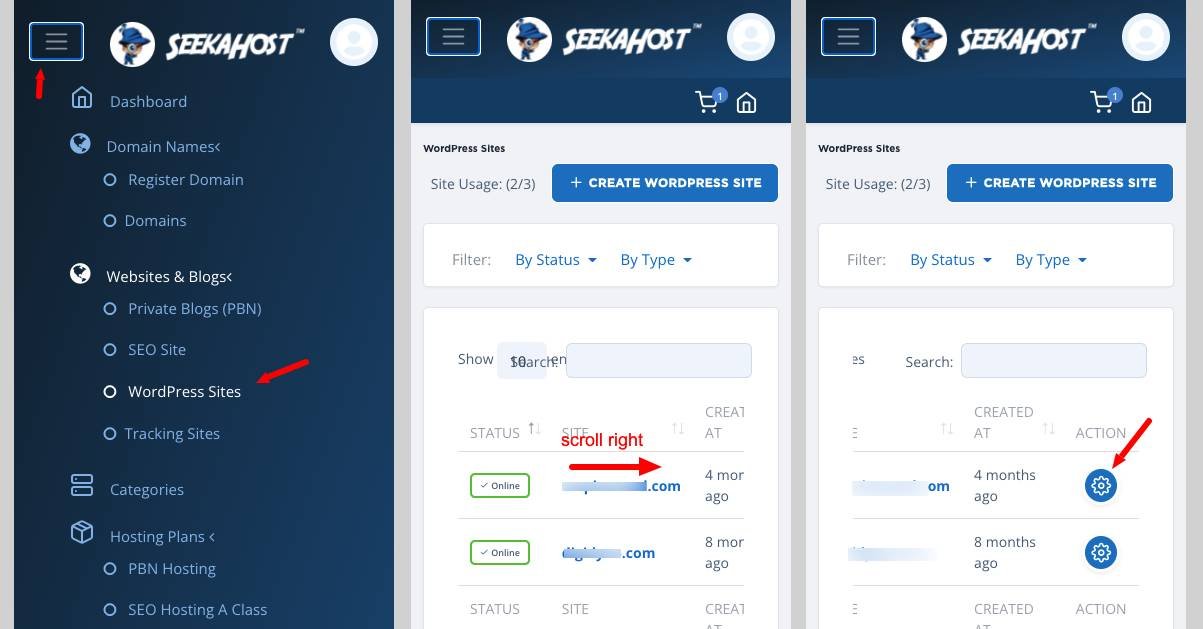
On the left side, you will see WordPress sites under WordPress & blogs. Click on it, and you will find your WordPress site listed.
Enter the WordPress site, blog title, and toggle the button to blue for site visibility.
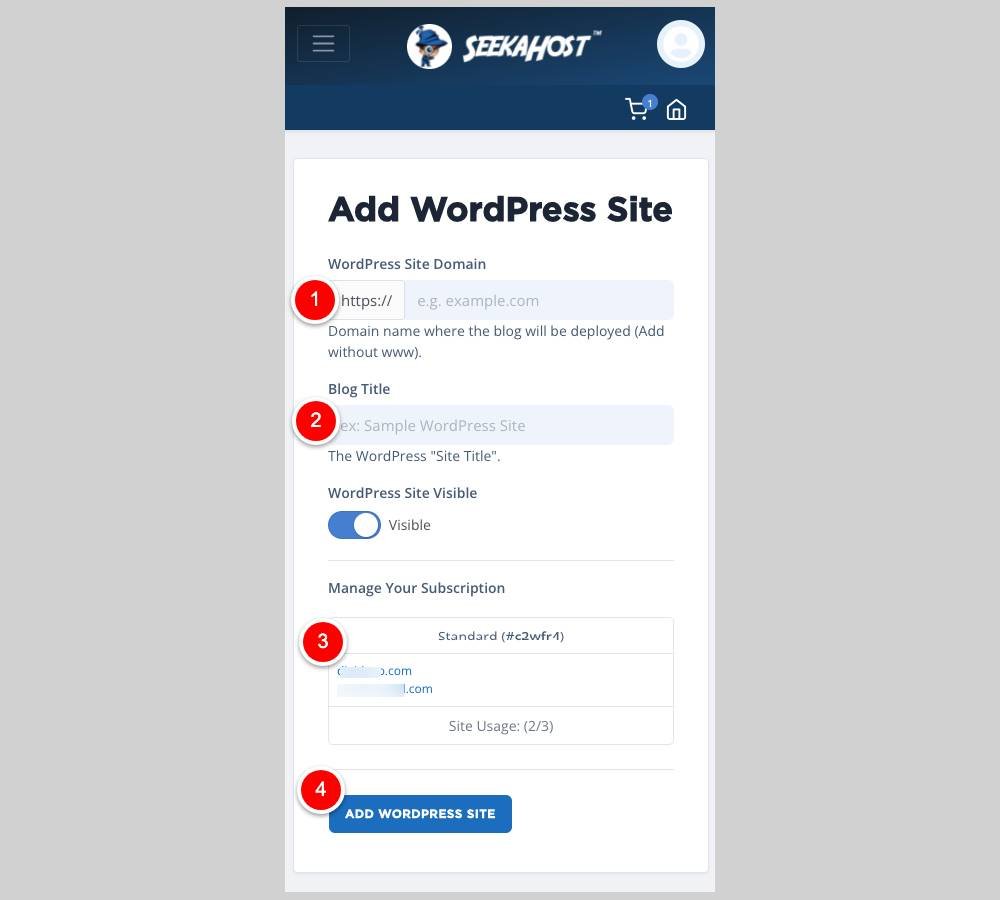
Click on Add WordPress site, and your site is ready to go live.
You get your WordPress login details in your email.
But wait, there’s one crucial step remaining – pointing the nameservers correctly.
How To Point the Nameservers to SeekaHost?
Go back to the domain settings. On the right side of the panel, you will find the Nameservers option. Click on it to modify the nameservers. Choose Custom nameservers rather than default.
You will find multiple fields for nameservers. But, you are required to change only two nameservers. Copy the nameservers as:
- ns1.seekaappcontrol.com and
- ns2.seekaappcontrol.com
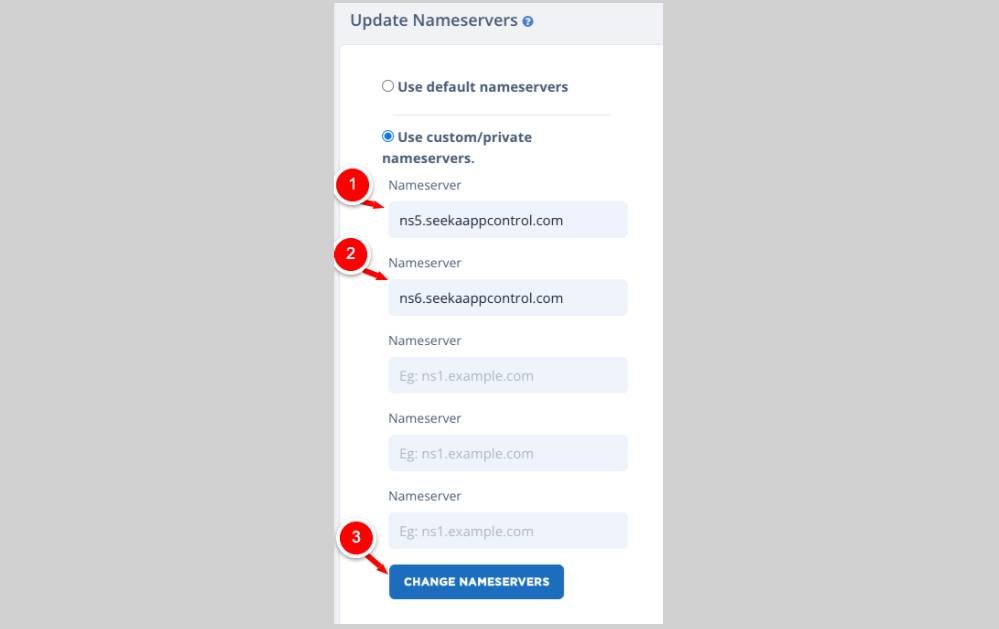
Paste these nameservers in the blank field. Click on the Change nameservers button and you are done.
You can check whether the nameservers are pointed correctly or not.
Now comes the security part of your blog.
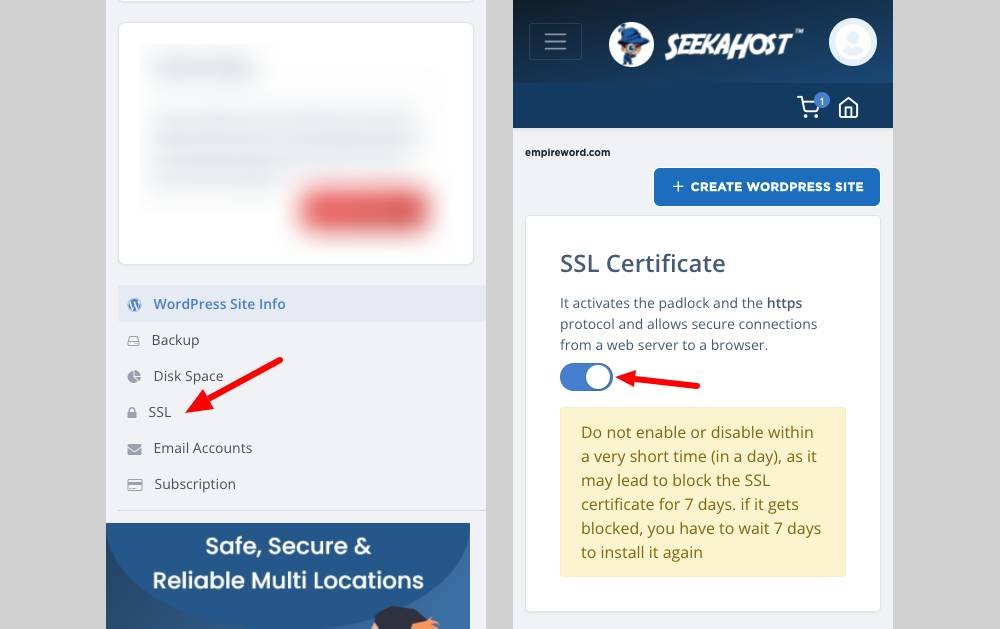
How To Add SSL To Your Blog and Start Blogging with an iPhone?
The reason I have shown the nameservers step before adding SSL is because it is required mandatorily.
So, after pointing the nameservers correctly, your WordPress blog is live. You only need to activate the SSL at one-click.
In the SSL option, simply toggle the SSL button to Blue and within 30 minutes, your site will be secured. You can later check your website URL with an SSL padlock.
You get Let’s Encrypt free SSL with the SeekaHost WordPress hosting.
These are the steps required to start blogging with an iPhone.
At this stage, you have setup your blog and it is live.
Writing Your First Post on your iPhone.
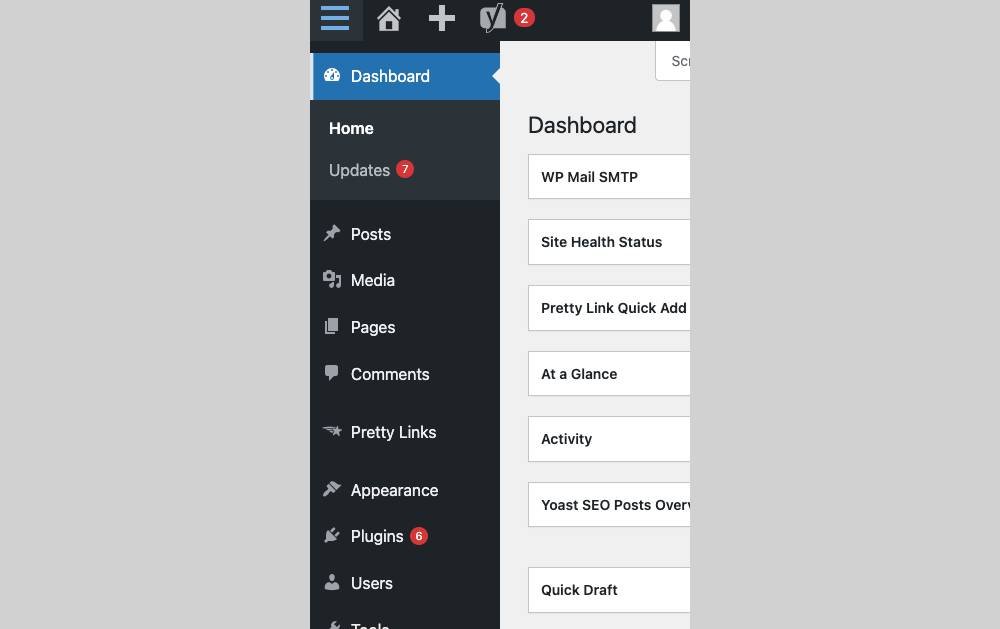
Now you can login to your wordpress website with the login credentials sent on your email and start writing your first post with an iPhone/iPad or any other smartphone.
WordPress comes with an in-built text editor but with less features.
I recommend you use Google docs with lots of features just like Microsoft Word.
You can copy the text and paste it inside the WordPress post.
Before you publish the first post on your blog, you need to setup WordPress theme and plugins.
I recommend the following themes and Plugins:
- GeneratePress Pro: Ultimate light-weight theme with block editor compatibility.
- Elementor Pro: Landing page builder to collect more leads.
- WPForms: Contact form to collect email leads.
- ShortCodes Ultimate: To insert buttons, tables, and more.
- UpdraftPlus: To backup your site regularly in case you lose all your data.
- Rank Math Pro: For on-page SEO and better Google rankings.
For installing the theme, go to Appearance > Themes > Add New > Browse the theme file and click on Install and then activate.
Similarly for installing the plugins, go to Plugins > Add New > Choose the plugin file and click Install and then activate.
After you have the theme and plugins installed, you can start publishing your post.
To write a post, go to Post > Add New and either paste the text from Google Doc or write inside the WordPress dashboard.
Add featured image, video links, and do some tweaks to make your post attractive.
Finally click on Publish and your post is live.
Conclusion
Blogging with an iPhone, iPad or any other smartphone is a whole new experience. In the beginning you will find it tiring, but as you move on, you will find it to be very useful.
How did you like this guide on blogging with an iPhone/iPad without PC?
Try it yourself and share it with others.

![How to do Live Stream on iPhone in [year]](https://myappleguide.b-cdn.net/wp-content/uploads/2023/10/How-to-do-Live-Stream-on-iPhone-in-year-150x150.webp)


![TablePlus Review [year]: Features, Pricing, Pros & Cons](https://myappleguide.b-cdn.net/wp-content/uploads/2025/07/TablePlus-Review-Features-Pricing-Pros-Cons-150x150.webp)