Have you ever thought about securing your privacy while browsing the internet?
Did you know that social networks record a log of your activity, and attribute it to your computer’s IP?
Do you want to hide your actual IP addresses from the internet and visit the websites anonymously?
If yes, then drill down my honest Surfshark review. If you haven’t tried any VPN yet, then you should read this post as I have covered real test results.
- Bottom Line UpFront
- Surfshark Introduction
- Reasons To Choose Surfshark VPN
- Salient Features:
- Surfshark VPN Sign Up Steps: Complete Set up Guide
- Surfshark VPN Sign In
- How To Use Surfshark VPN On Mobile Device?
- How To Check If Your Current IP Is Changed Or Not?
- How To Check the Speed of the VPN Location You Are Connected To?
- Surfshark Pros and Cons
- Surfshark Alternatives and Competitors
- Surfshark Pricing
- FAQs
- Also Read:
- Surfshark Review Conclusion: My Verdict
[alert-note]
Bottom Line UpFront
For sure, you can browse the internet anonymously with VPN software. VPN networks do not put a load on your pocket and still keep you away from getting tracked.
Also, there are many websites that are not available in your country but someone else in a different country can access them. With VPN software, you can also access that website, by changing your IP virtually.
Surfshark is one of the best VPN service providers across the globe.
It is super easy to sign up and buy a VPN subscription.
In this Surfshark review, I will show you:
- How to sign up and buy a VPN plan?
- How to use VPN in your browser?
- How to use VPN on your smartphone?
- Speed test results from US VPN and AU VPN
- Which pricing plan is best for you?
Before anything else, let me mention that I have my referral link on the buttons. So, you can buy your preferred Surfshark VPN plan using my link.
Let’s first see the website and understand the company and its product.
[/alert-note]
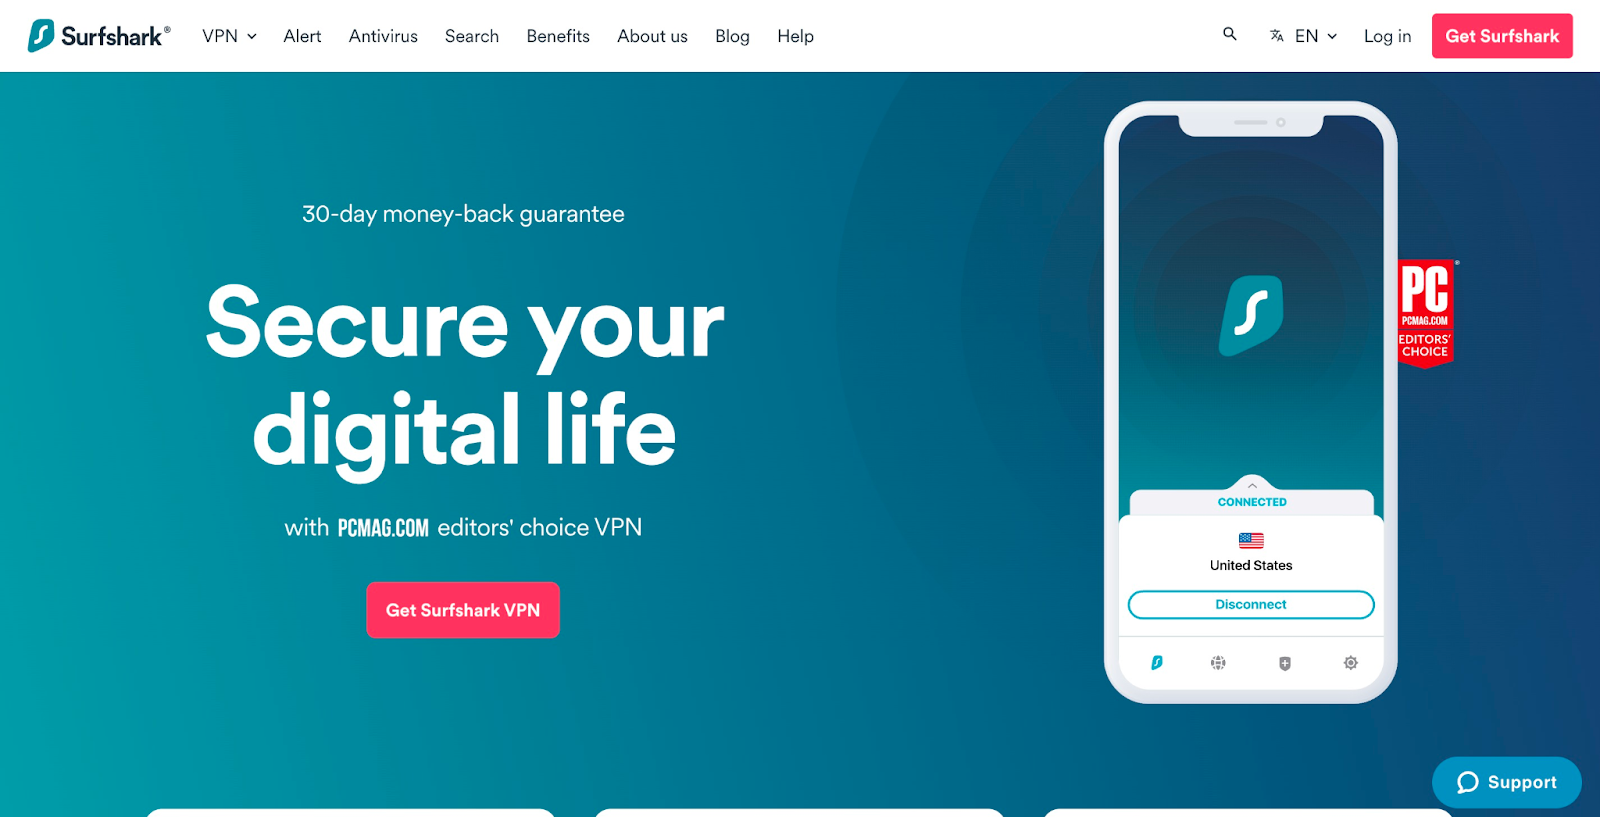
Surfshark Introduction
As mentioned on the homepage, Surfshark offers a 30-day money-back guarantee. So, you can go ahead right now and buy a VPN plan. It is risk-free.
The most important features of SurfShark VPN are:
- Private browsing,
- Different IP
- Safe internet browsing while you travel.

There is a unified pricing system. All you need to choose is the billing cycle.
If you commit to more time, the pricing will be lower.
For international customers,
The Monthly cost is 12.95 US dollars per month on monthly billing.
When you choose to get billed yearly, the pricing is just 3.99 US dollars per month (which is around 47.88 US dollars in a year)
And when we talk about paying for 24 months in one go, the cost comes to around 2 and a half dollars per month (which will be 59.76 US dollars for 2 years). It is a whopping 81% off.
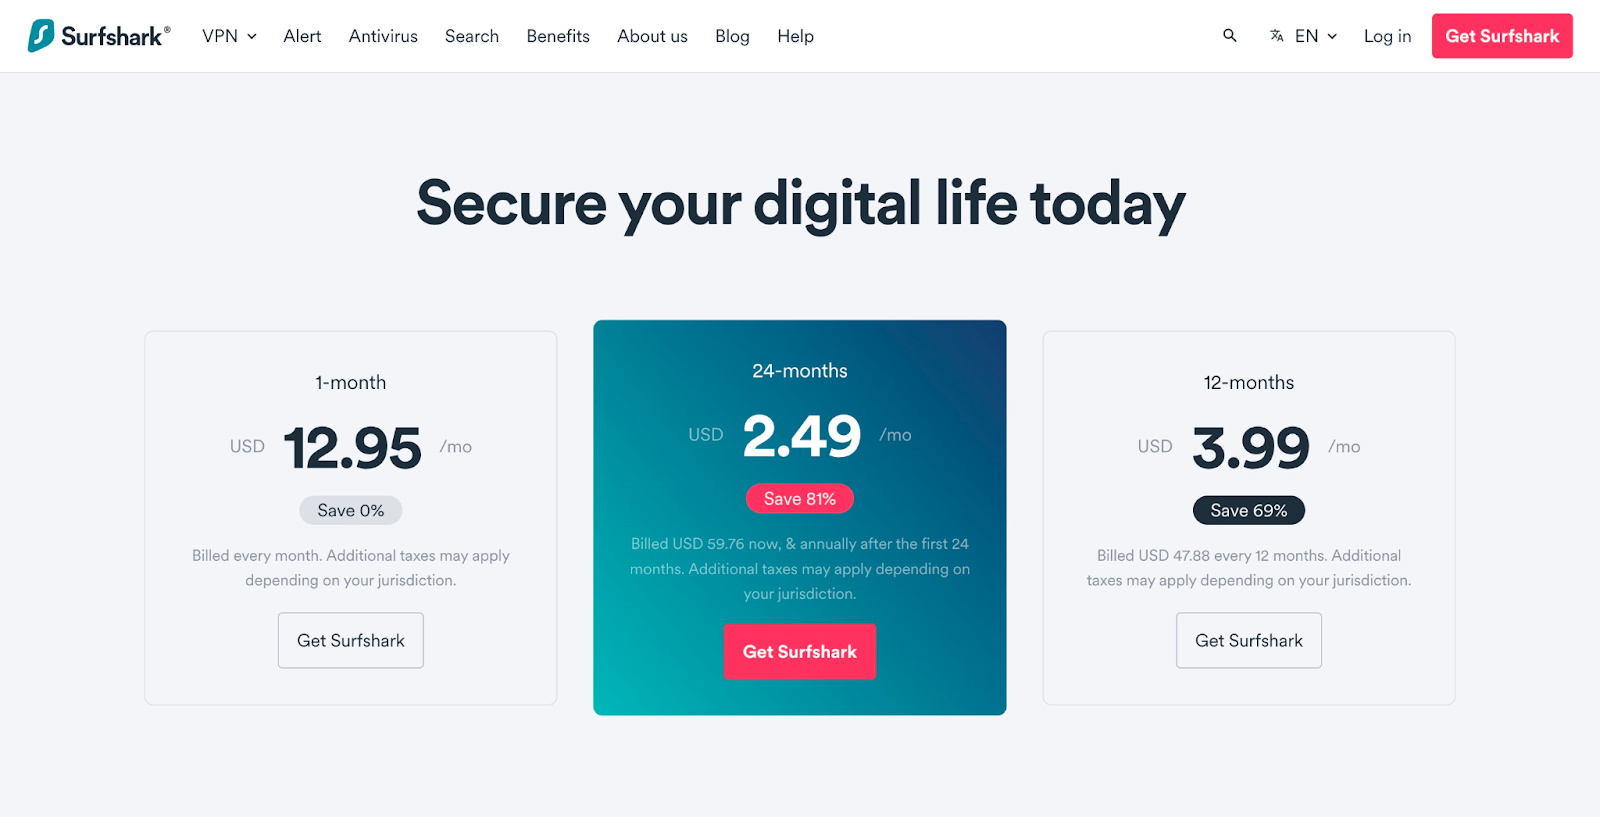
All I can say right now is that Surfshark is the cheapest VPN service provider.
[alert-announce]
Reasons To Choose Surfshark VPN
Money-back Guarantee:
When you purchase Surfshark VPN plan, you are backed by a 30-day money-back guarantee. So, if after signing up you think Surfshark isn’t working as per your expectations, then you could cancel the plan within 30 days.
Device Connection:
You will rarely find a VPN that allows you to connect all your devices with just one subscription. Surfshark is the VPN that secures all your home devices.
Anonymity and Logs Policy:
Your device is under continuous surveillance by your ISP and under the Government radar. Surfshark ensures nothing is recorded when you are using the internet. After all, the internet is free for everyone. Surf anonymously without worrying about data being recorded.
Data Protection:
Enable the Kill Switch feature to ensure your data is safe even when the VPN connection breaks down. You can enable the Auto-connect feature and enjoy surfing limitlessly.
Support:
For any technical or sales concern, you can reach out to the Surfshark support team. They are available via Live chat, email, or social media.
[/alert-announce]
Salient Features:
You can find all the features on the Surfshark website, but I am covering them here in short.
- Secure and fast protocols that include WireGuard, IKEv2/IPsec, and OpenVPN UDP / TCP.
- AES 256 GCM encryption.
- Data leak protection.
- No data logs policy.
- 2-factor authentication.
- Malware alerts.
- No ads, clean interface.
- Minimize tracking chances with MultiHop feature. This feature allows you to connect to two different VPN servers at the same time.
- Browser extension blocks cookie pop-up.
- Automatic IP rotation.
- Bypass and exclude websites from VPN.
Let’s move ahead with the Surfshark review and buy a VPN Plan.
Surfshark VPN Sign Up Steps: Complete Set up Guide
To sign up on Surfshark, simply choose the billing term and click on the respective “Get Surfshark” button.
You can choose to bill for 1 month, 12 months or 24 months plan.

There is a smooth 4-step process to complete buying the VPN plan.
- In the first step, you choose the plan. (monthly, yearly, or 2-year plan)
- Type your email address in the second step
- In step 3, you can choose to activate Surfshark or not (this is a powerful add-on and only costs 1 and a half dollars per month). This will be added to your billing accordingly if you activate it.
- The fourth option gives you unlimited payment methods. You can pay via a Credit card, PayPal, Google Pay, Amazon Pay, UPI, Cryptocurrency, and other payment options.
Choose your preferred payment method and complete the checkout process.
Note – You will have to pay 18% GST (if you’re in India). So, the 2-year plan becomes 70 US dollars and the 1-year plan will be 56.50 US dollars.
All the payments are secured with 256-bit encryption. All plans are backed by a 30-day money-back guarantee. In case you are dissatisfied with a plan, simply cancel the plan and get your money refund.
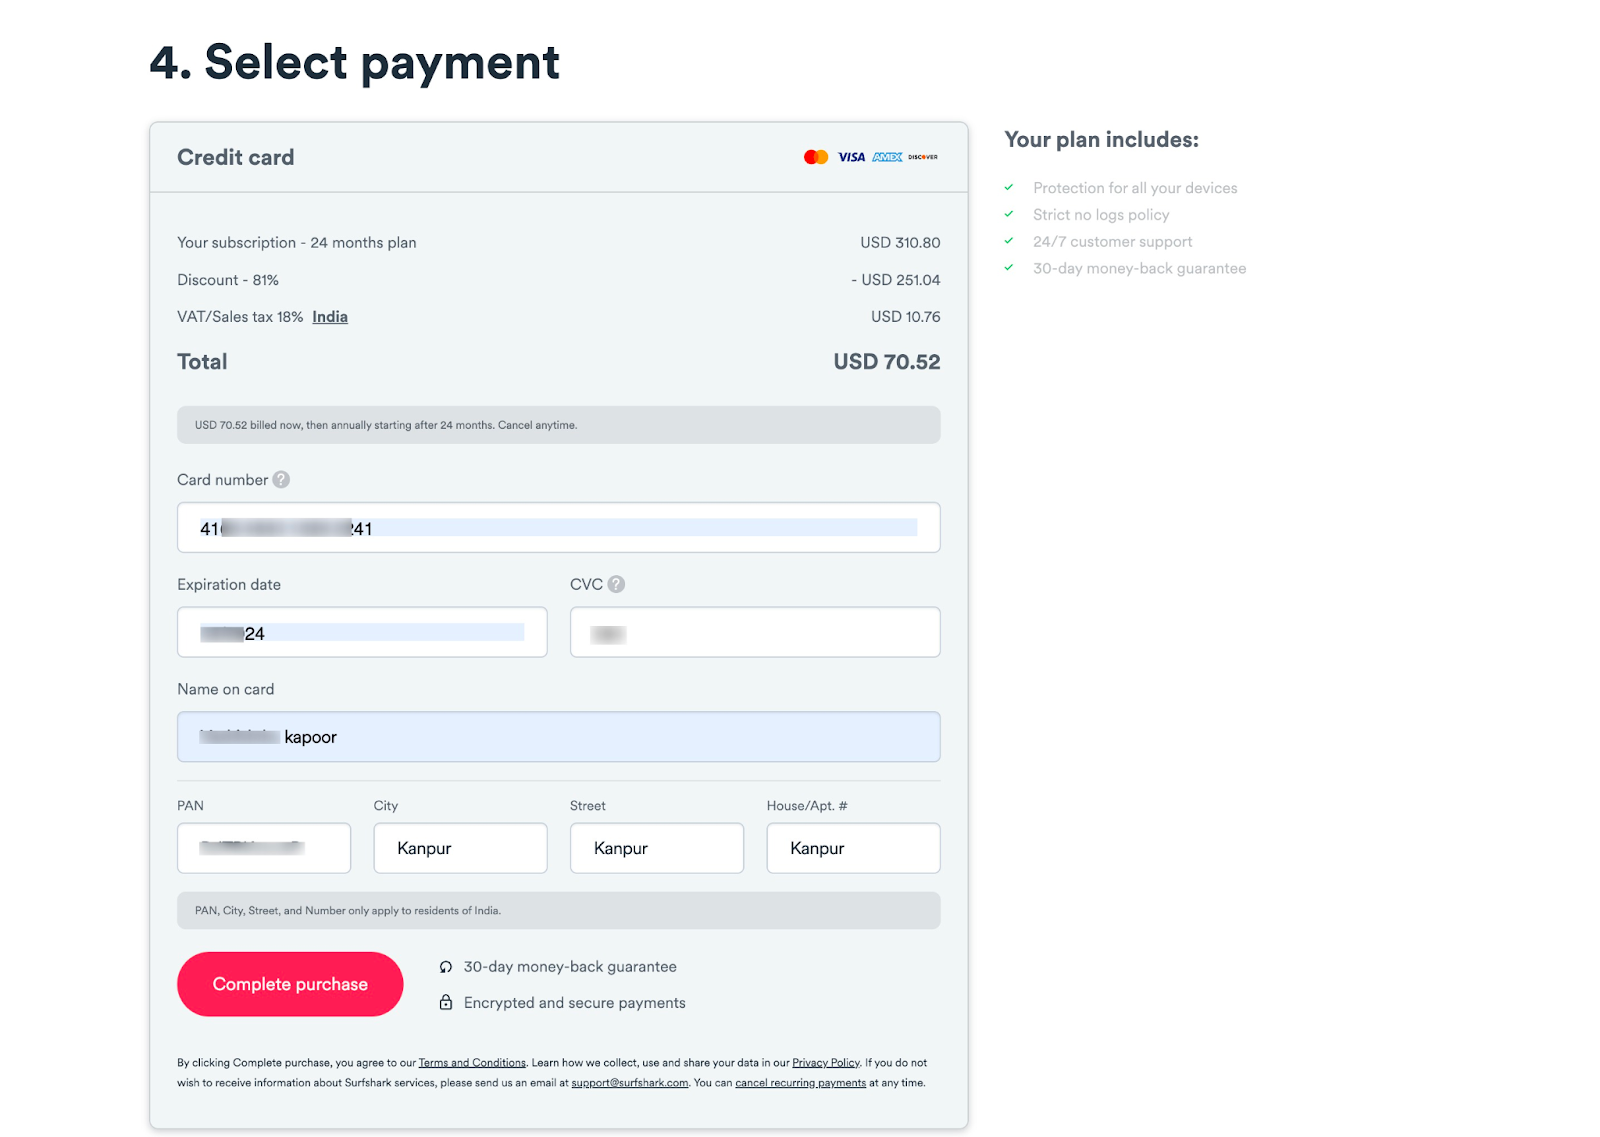
I just updated my country to India and here’s what the pricing looks like.

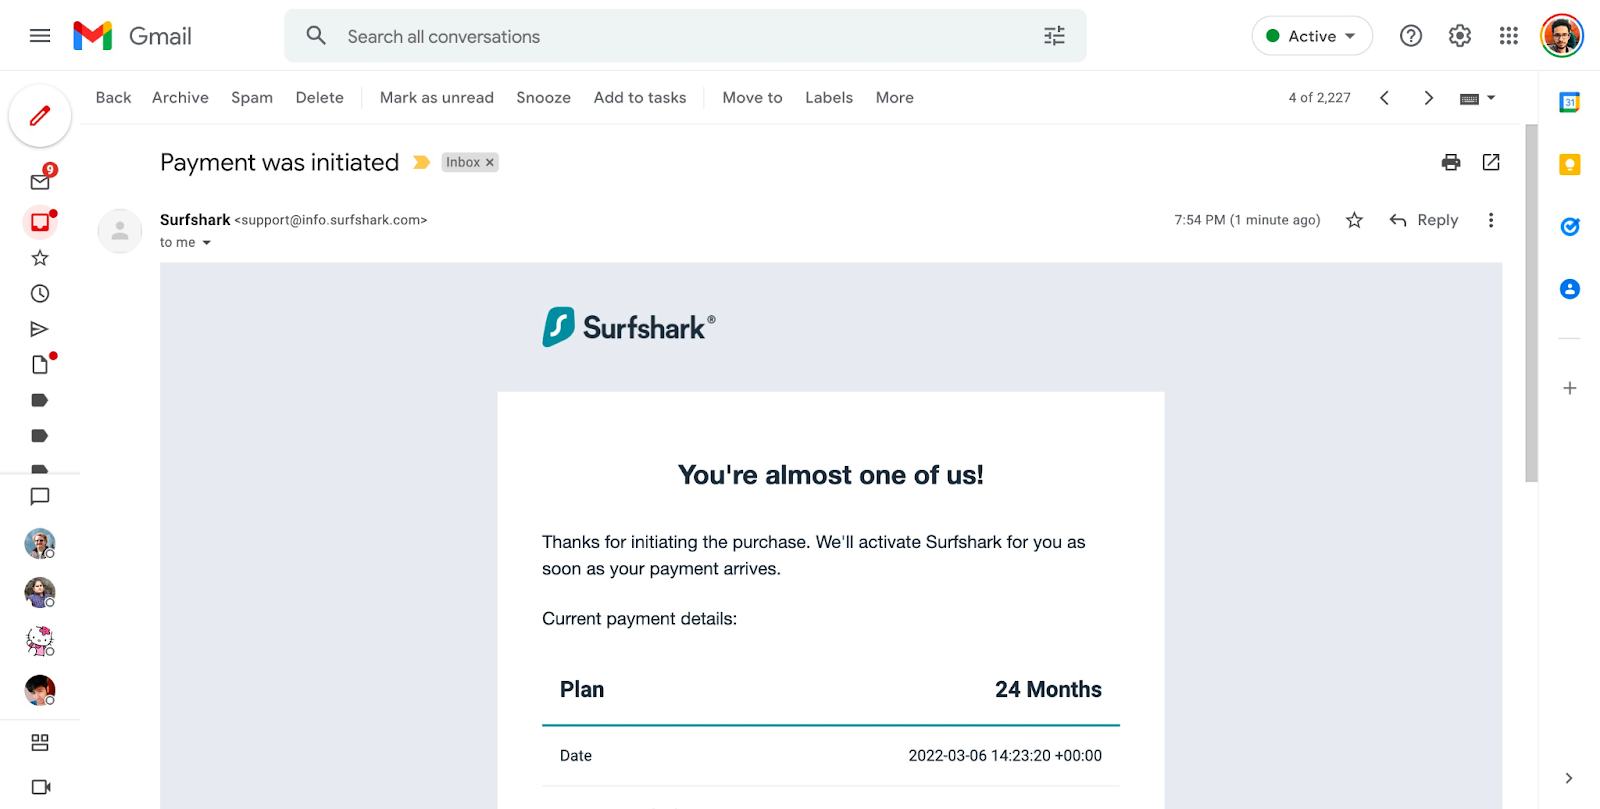
Once you complete the payment process, you will see a prompt like this, I used UPI payments for this.

I received this email even before I made the payment.
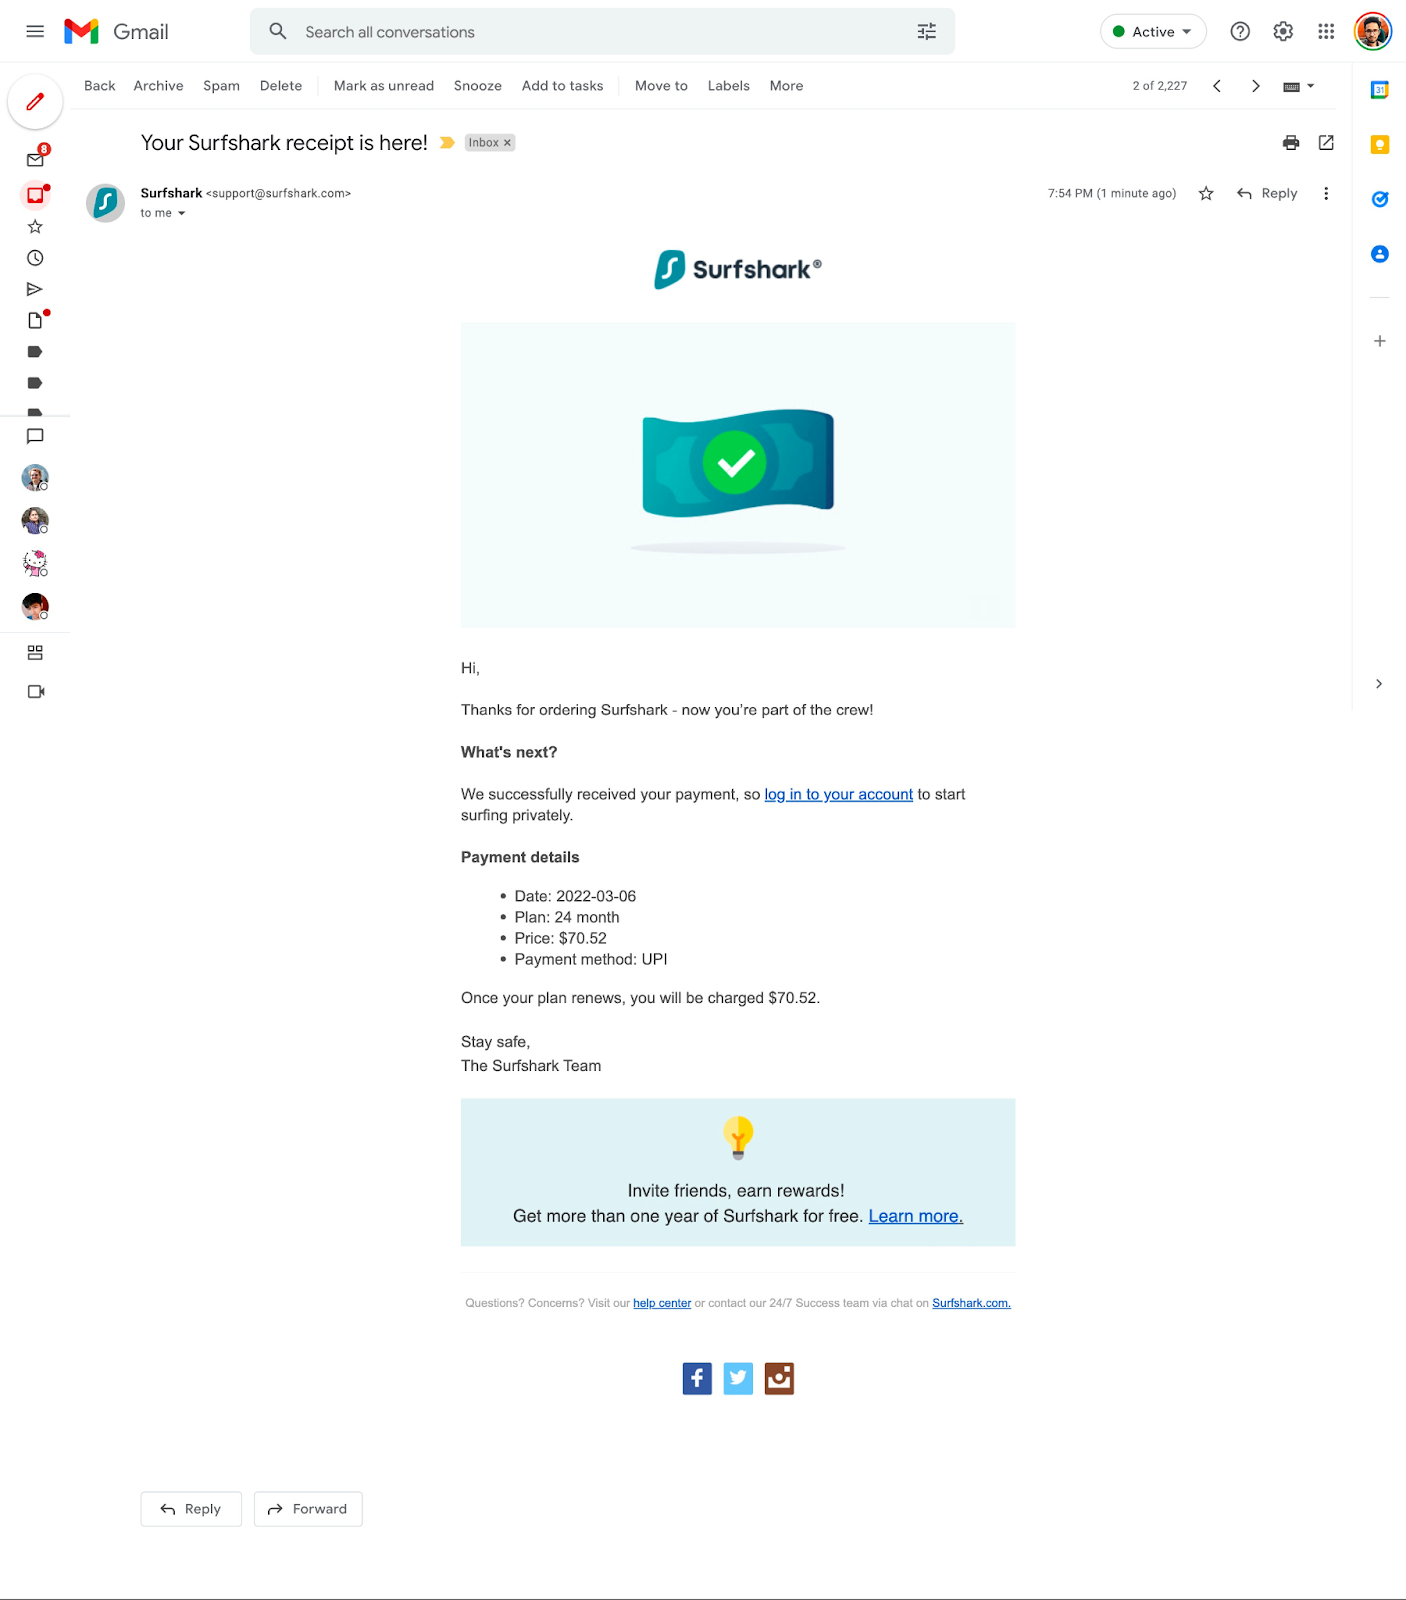
Once the payment got completed, I received an email. The email mentions details like:
- The plan which I chose
- Price I paid
- And the payment method
Now to start using Surfshark VPN, let’s log in to the account.
Surfshark VPN Sign In
Before I can log in, I need a password. I can generate the password in the browser screen which came up after I completed the payment.
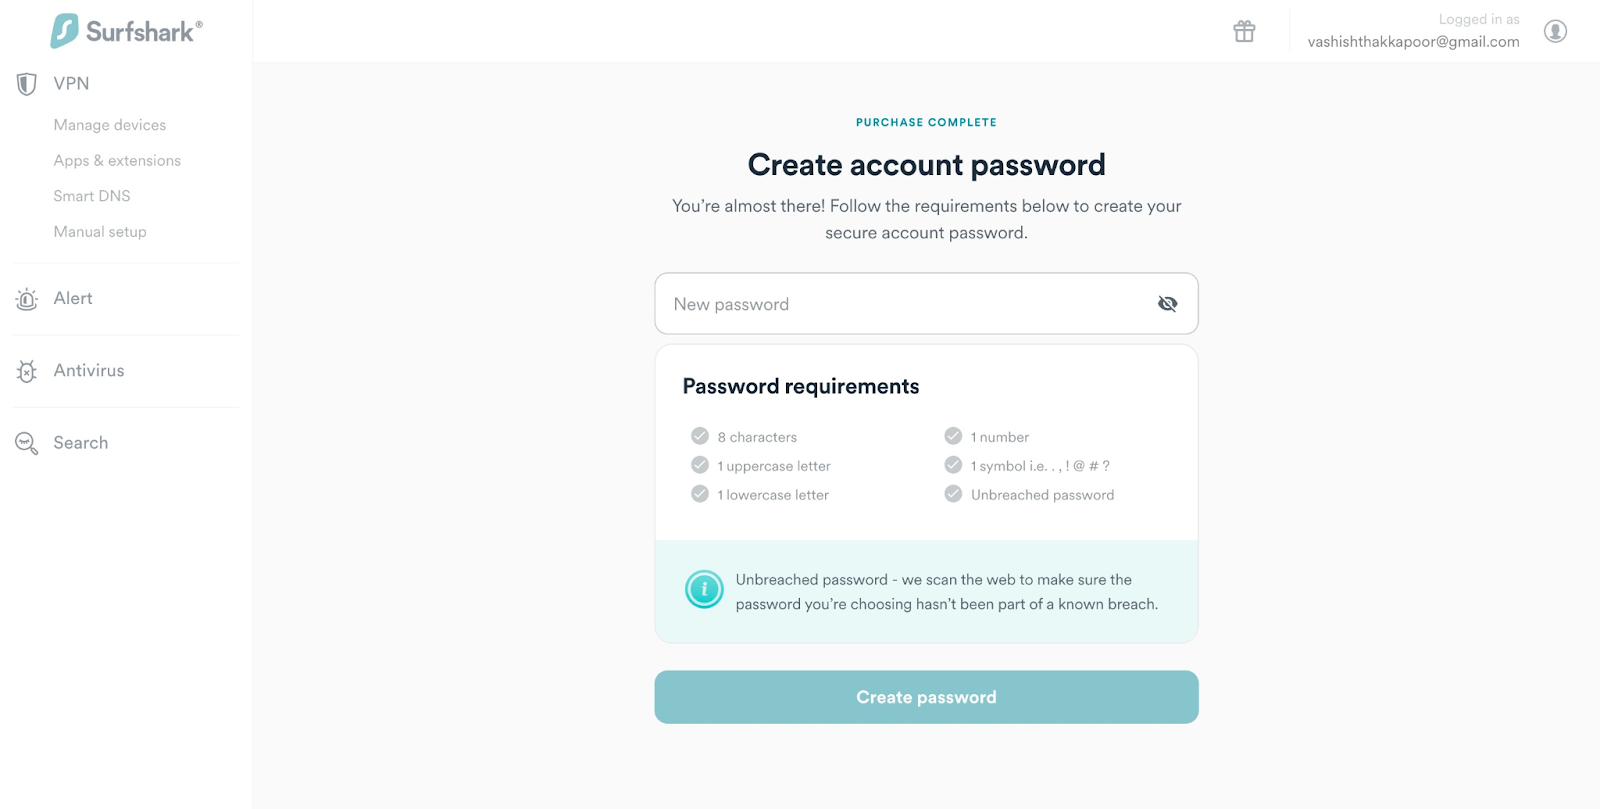
Make sure you set a strong password so that all the check icons become green.

Now my account is ready and I can log into my Surfshark account..
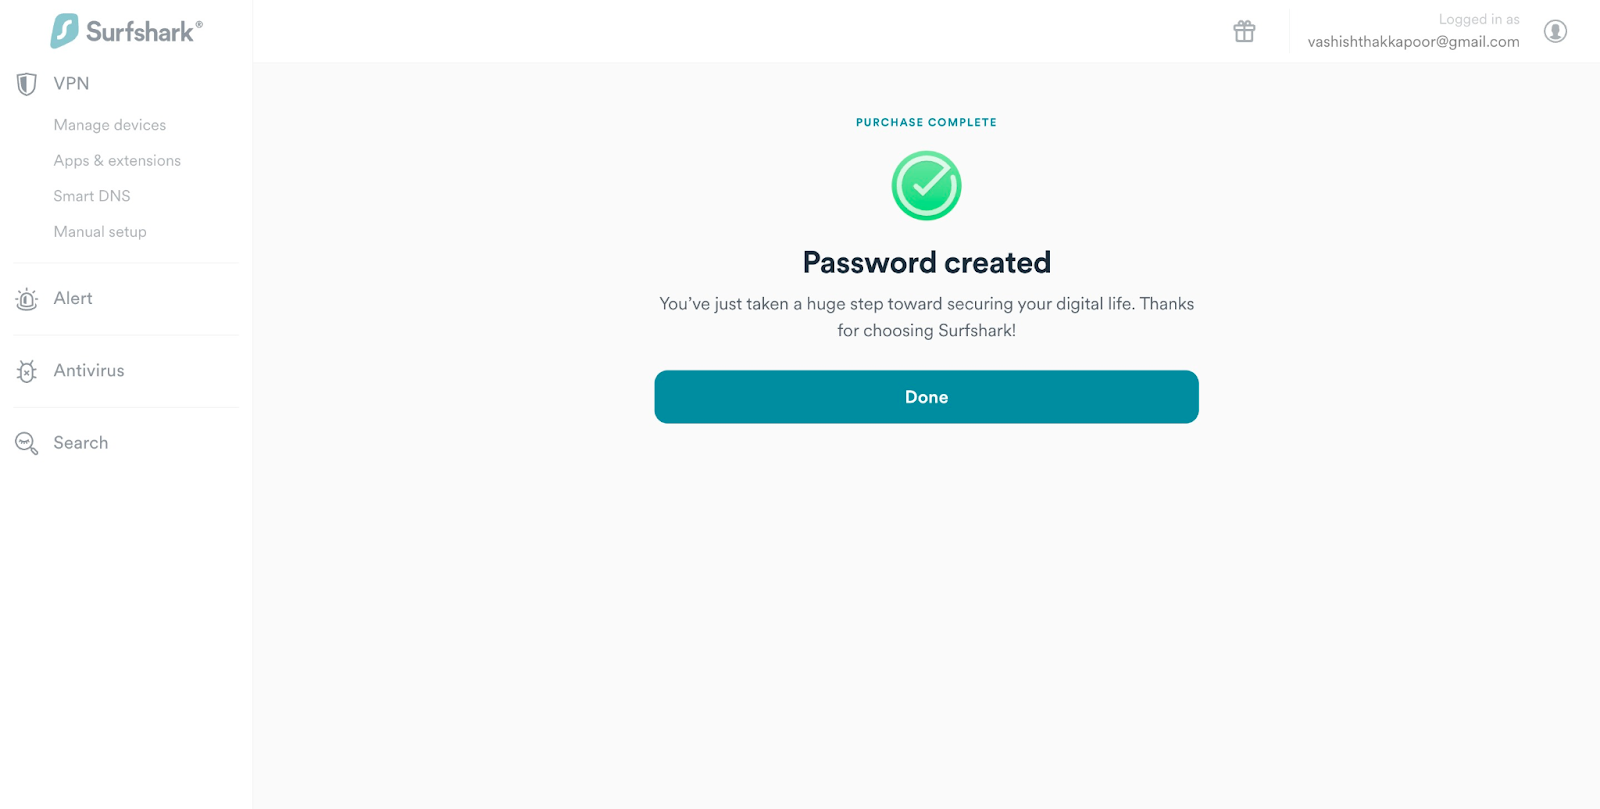
Click on “Done” and it will take you to a quick start guide.
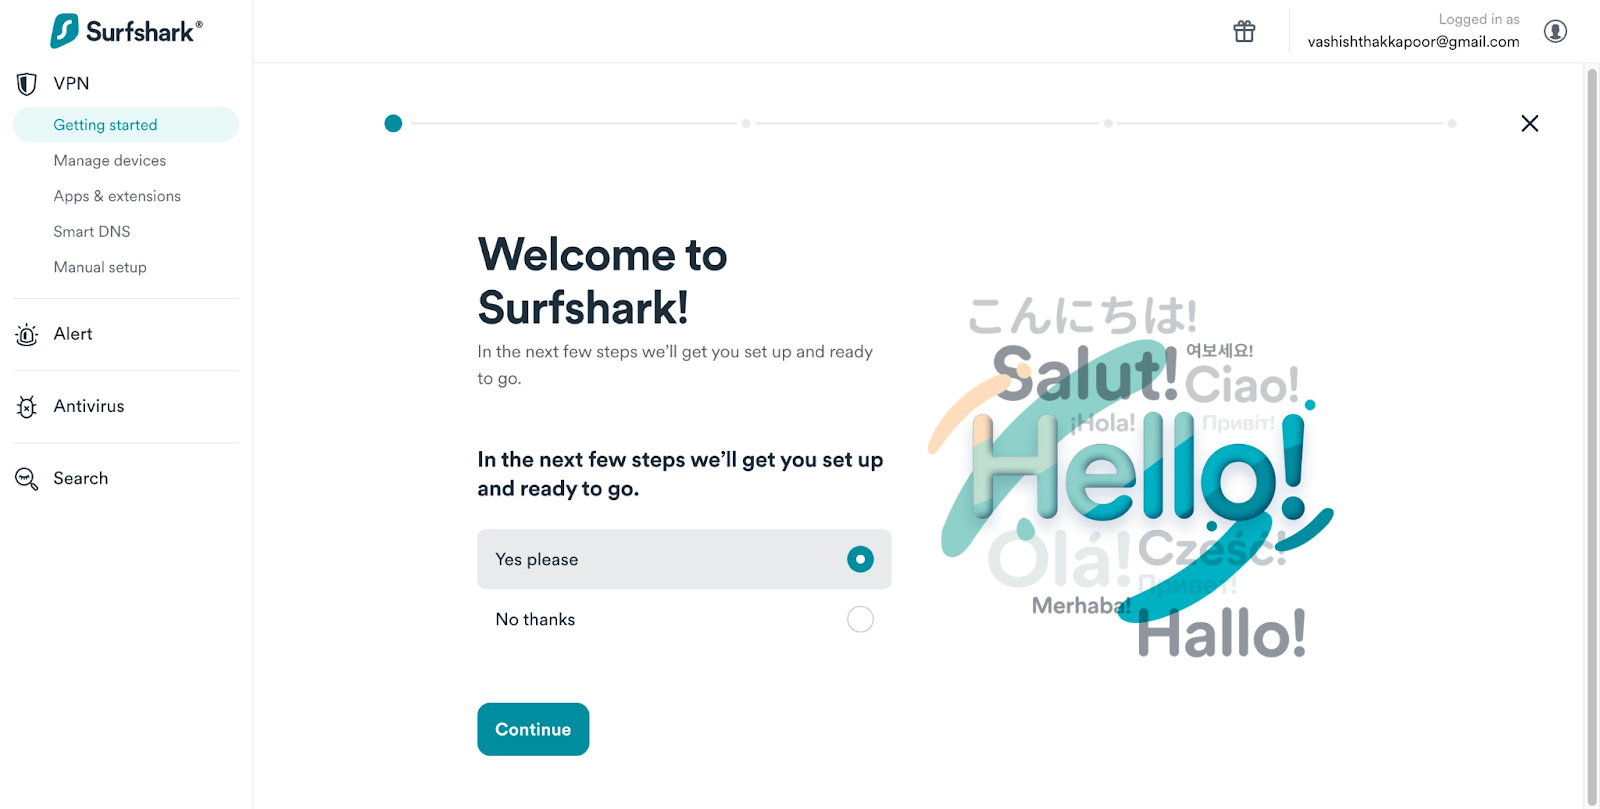
Choose “Yes” and click on “Continue”. You can skip the guide and select No thanks option.
In the next step, you see a QR code to use the VPN in your phone.

Scan that QR code to download and install the App. The application is available for both Android and iOS devices.
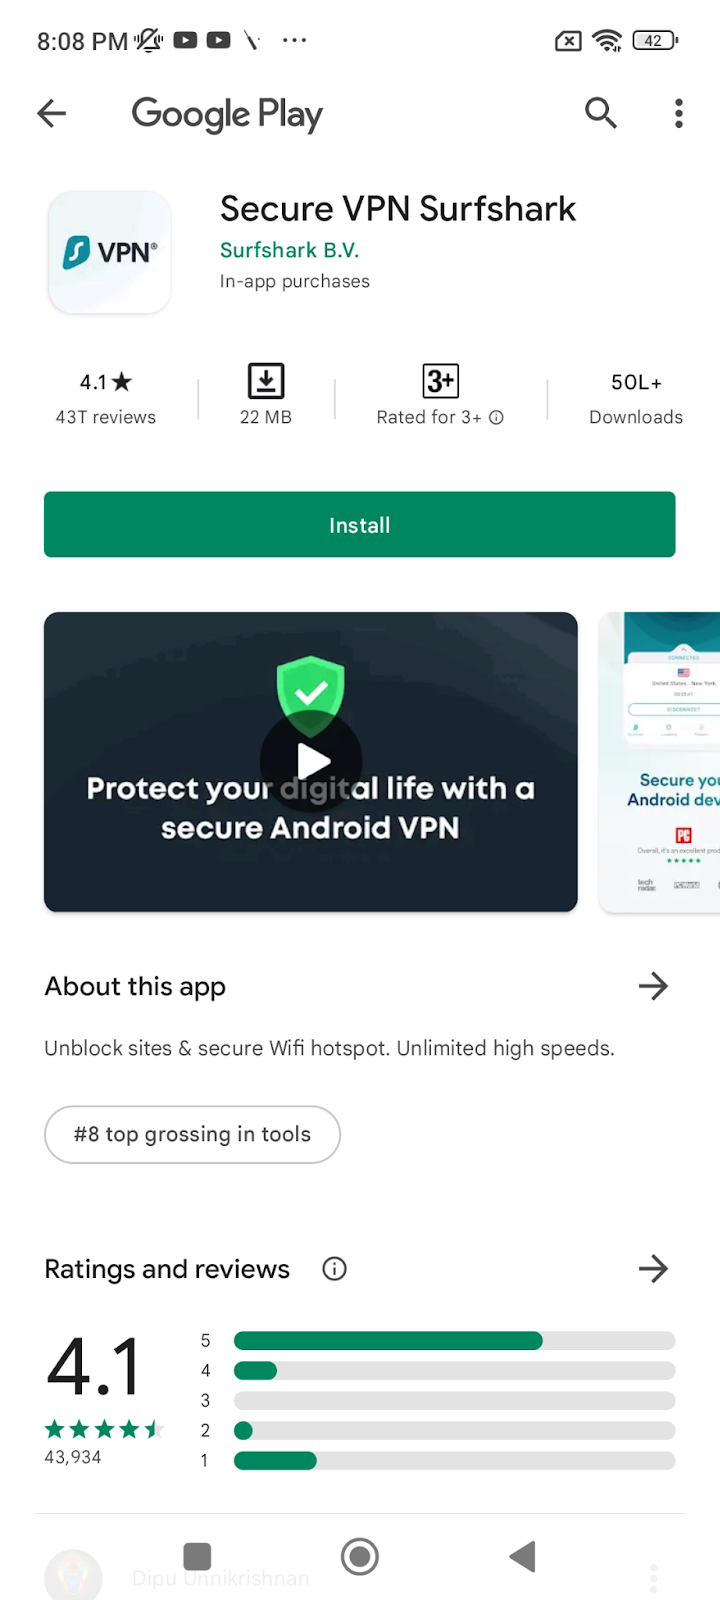
Install the mobile application on your device if you want to browse anonymously using your phone.
I will now use my android phone to surf anonymously.
Let’s do it.
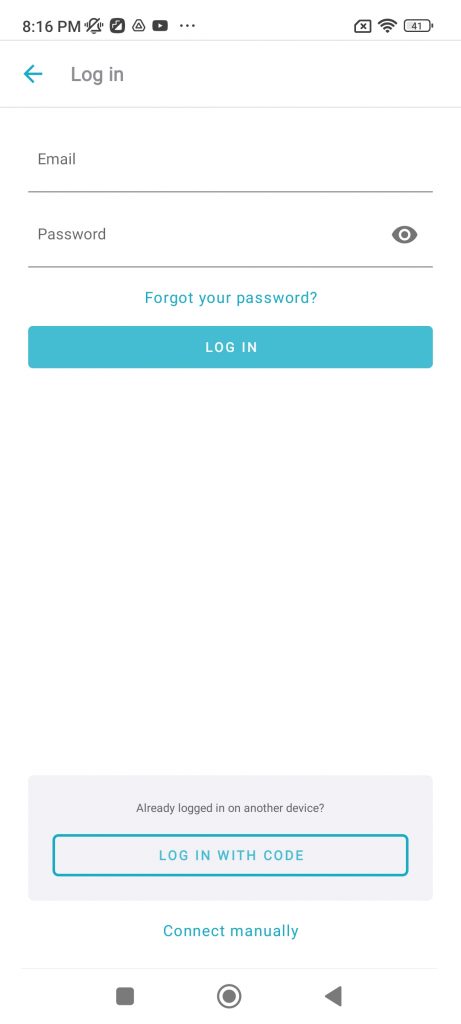
Step 1: Open the mobile app and click on “Existing User? Log in”
Step 2: On the bottom of your screen, see “Log in with code”. Click it.
Step 3: You will see a code on your screen. (I have blurred it in the screenshot)
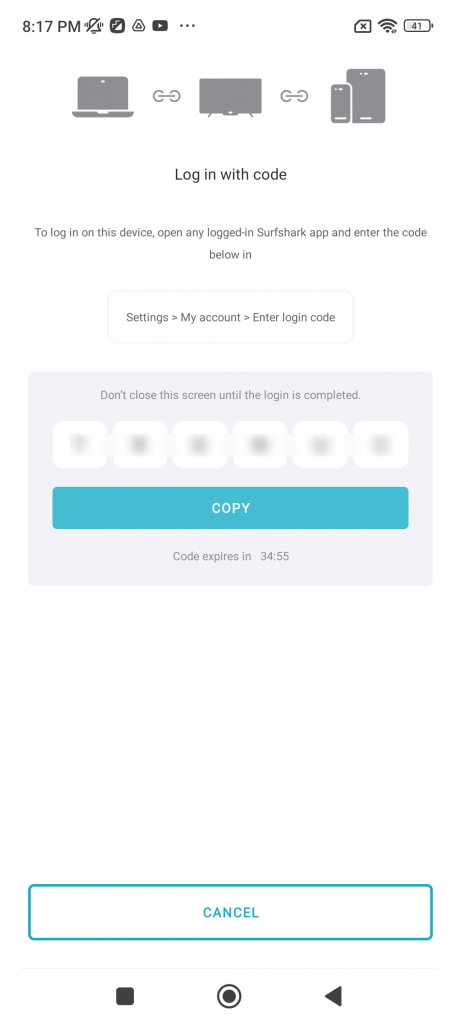
Now move your head to your laptop/desktop’s screen. And continue to the quick start Guide where we left off.
Click on the 3rd tab which says “Enter Login Code”

Paste the code you received in the mobile app and click on “Next”

Once you hit “Next”, you will see that you’re auto logged into your mobile app.
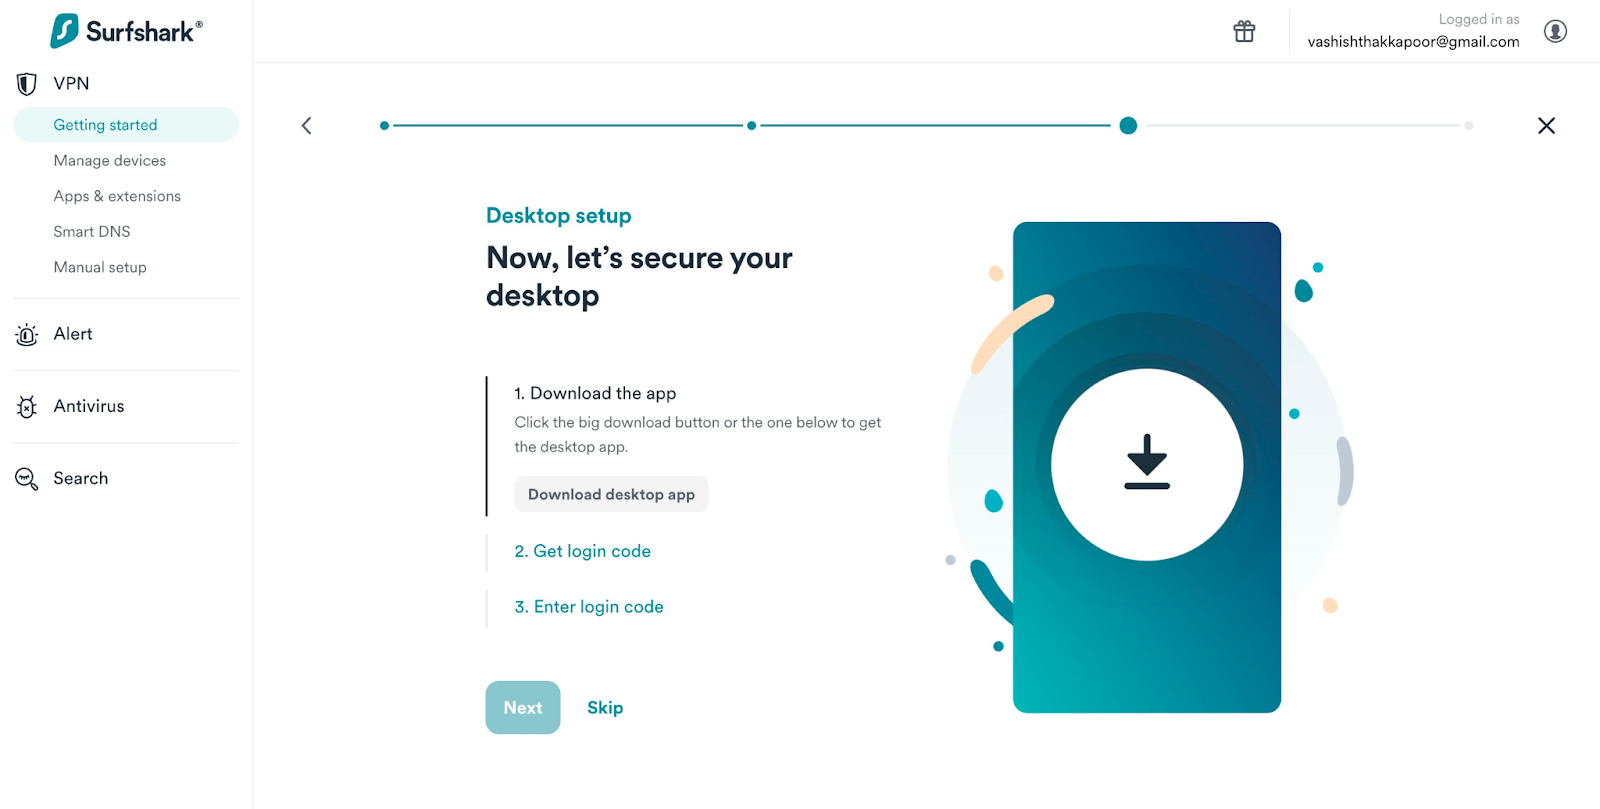
Next up, you can install the Surfshark desktop app likewise. But for now, let’s skip that step and use Surfshark VPN on mobile phones.
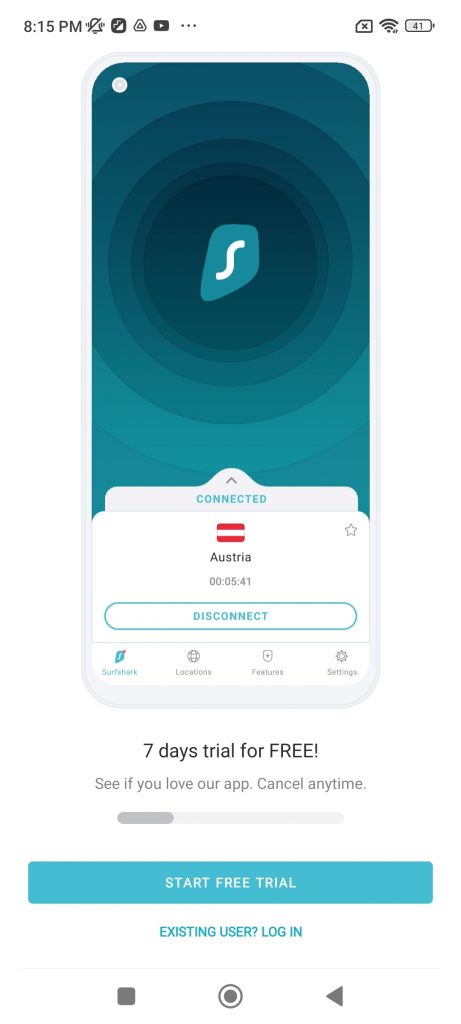
How To Use Surfshark VPN On Mobile Device?
Follow these steps cautiously to use the Surfshark VPN app.
- On your mobile phone and open the Surf Shark app. You will see the “Connect” button on the bottom of your screen.
- Click on the Connect button and it will connect you to the nearest VPN location. It will require permissions to monitor network traffic. Click Ok.
- You can see that I am connected to a different Indian IP address.
- Click on the “up” icon. It will reveal the details about my current connection.
Let’s change the IP location to a different country.
- Click on “Locations” from the bottom dock menu. Now here, you will see the option to choose from multiple locations. You can choose from the Fastest locations, Nearest Country, and custom locations.
Also, you can choose to use a static IP in a specific country also.
- Click on the “Search” icon in the top right corner. Type your preferred location. From the search results, choose the target location.
Now in a few seconds, it will connect you.
I am now connected and using a US-based IP Address.
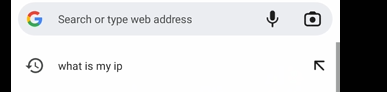
How To Check If Your Current IP Is Changed Or Not?
You can test your current IP if it changed or not
To do that, simply search “what is my IP address” on google and it will get you the results.
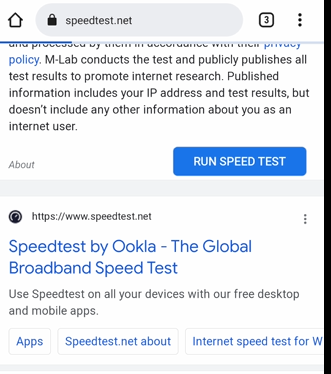
How To Check the Speed of the VPN Location You Are Connected To?
Getting a satisfactory speed on a VPN connection is very important. Otherwise, it won’t be of any use.
Let me do a speed test and see what speed it is getting.
I am in India. Connected to a 100 MBPS wifi and you can see, it selected Dallas – which is my virtual location now.
And I clicked “Go” to test the speed.
It is giving me around 100 MBPS speed too.
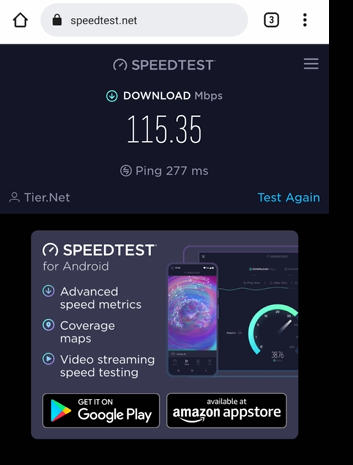
Now that’s a great thing!
More Speed Tests
Let me do more tests by connecting to several other locations and showing you the results.
Google Speed test – Static IP (Speed without VPN is 137 mbps down and 91 mbps up)
| Zone / IP type | Download | Upload | Browser |
| Static – NY – test 1 | 37 mbps | 5.87 mbps | Chrome – Incognito |
| Static – NY – test 2 | 35.9 mbps | 1.66 mbps | Chrome – Incognito |
| Static – NY – test 1 | 32.8 mbps | 2.10 mbps | Chrome – Normal |
| Static – NY – test 2 | 39.1 mbps | 4.27 mbps | Chrome – Normal |
Google Speed test – Virtual IP (Speed without VPN is 137 mbps down and 91 mbps up)
| Zone / IP type | Download | Upload | Browser |
| New york – test 1 | 47.6 mbps | 18.1 mbps | Chrome – Incognito |
| New york – test 2 | 50.4 mbps | 16.4 mbps | Chrome – Incognito |
| New york – test 1 | 40.5 mbps | 26 mbps | Chrome – Normal |
| New york – test 2 | 49.4 mbps | 15.5 mbps | Chrome – Normal |
| Zone / IP type | Download | Upload | Browser |
| AU Sydney – test 1 | 57.4 mbps | 47.6 mbps | Chrome – Incognito |
| AU Sydney – test 2 | 62.7 mbps | 51.8 mbps | Chrome – Incognito |
| AU Sydney – test 1 | 61.5 mbps | 33.7 mbps | Chrome – Normal |
| AU Sydney – test 2 | 68.9 mbps | 98 mbps | Chrome – Normal |
| Zone / IP type | Download Speed | Ping | Browser |
| AU Sydney – test 1 | 126.22 Mbps | 171 ms | Chrome – Incognito |
| AU Sydney – test 2 | 125.46 Mbps | 174 ms | Chrome – Incognito |
| AU Sydney – test 1 | 127.06 Mbps | 173 ms | Chrome – Normal |
| AU Sydney – test 2 | 128.12 Mbps | 201 ms | Chrome – Normal |
Surfshark Pros and Cons
Pros:
- Unlimited number of devices
- Advanced security features like AES 256 GCM encryption.
- Two-factor authentication.
- 24/7 support.
- Kill-switch protects your device when the VPN connection breaks down.
- Use Surfshark VPN from anywhere around the world.
Cons:
- I haven’t faced any issues till now. Most customers face support issues. I will update the support part if I come across it anyway.
Surfshark Alternatives and Competitors
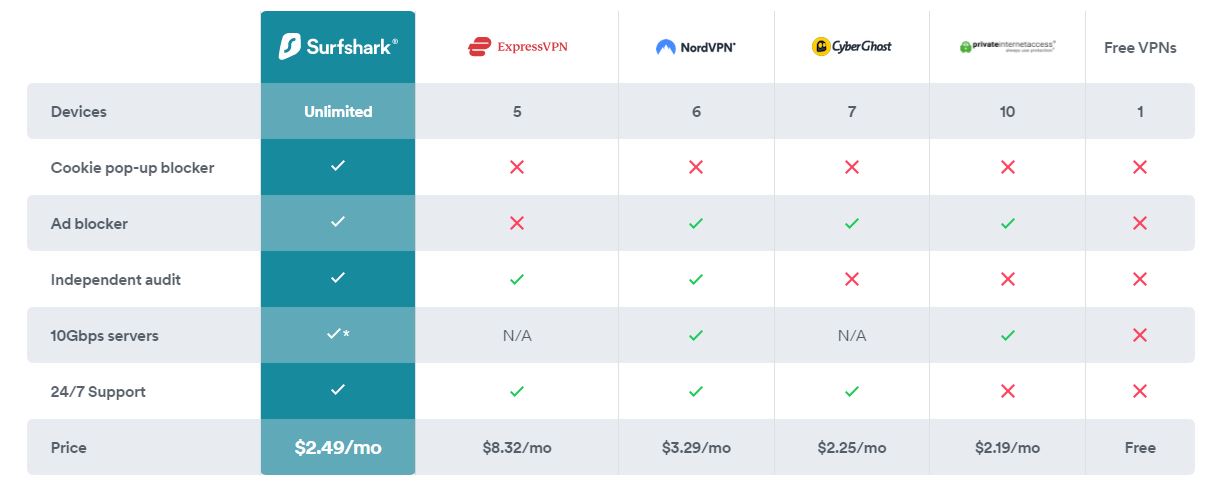
Price: The price of Surfshark starts at $2.49/mo., but NordVPN starts at $3.29/mo. Also, ExpressVPN’s price starts at $8.32/mo.
No of Devices: Surfshark can be used to protect an unlimited number of devices. Whereas there are limitations on the number of devices in other VPNs. CyberGhost allows 7 devices, NordVPN allows 6 devices, and ExpressVPN allows 5 devices.
Independent Audit: Surfshark includes independent audit features whereas CyberGhost doesn’t.
Adblocker: To block unwanted ads, you need Surfshark VPN as ExpressVPN lacks this feature.
2-factor authentication: To add an extra layer of security, Surfshark provides 2-factor authentication. But you find this feature in CyberGhost and ExpressVPN.
Get SurfShark VPN Now – $2.49/mo
Surfshark Pricing
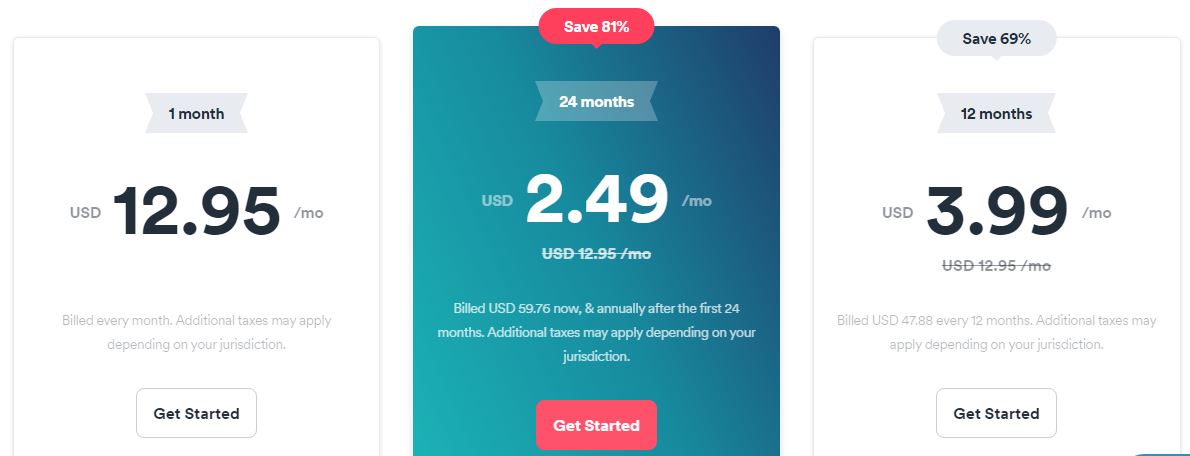
The pricing is affordable and looks even cheaper compared to CyberGhost and ExpressVPN. You can choose to pay monthly, yearly, or for 24 months.
The one-month plan starts at $12.95 per month with additional taxes.
The 12 monthly plan starts at $3.99 per month with taxes extra.
The last plan is 24 months starting at $2.49 per month. This plan saves you 81% OFF with additional taxes charged depending on your country of residence.
Get SurfShark VPN Now – $2.49/mo
FAQs
[sc_fs_multi_faq headline-0=”h2″ question-0=”What is Surfshark?” answer-0=”Surfshark is a VPN service provider that allows you to stream and download content anonymously with strict no-logs policy. ” image-0=”” headline-1=”h2″ question-1=”Is Surfshark safe to use?” answer-1=”Yes, Surfshark is completely safe and secure as it uses security protocols like AES 256 GCM and advanced security features.” image-1=”” headline-2=”h2″ question-2=”Is Surfshark better than ExpressVPN?” answer-2=”Surfshark can protect an unlimited number of devices at a cost cheaper than ExpressVPN. This makes Surfshark a better choice for a VPN service provider.” image-2=”” count=”3″ html=”true” css_class=””]
Also Read:
Surfshark Review Conclusion: My Verdict
Talking about privacy and not using a VPN sounds like an impossible combination.
I recommend Surfshark if you are looking for a secure VPN provider.
This was it from my side about Surfshark. I hope my honest Surfshark review was helpful and informative.


![TablePlus Review [year]: Features, Pricing, Pros & Cons](https://myappleguide.b-cdn.net/wp-content/uploads/2025/07/TablePlus-Review-Features-Pricing-Pros-Cons-150x150.webp)